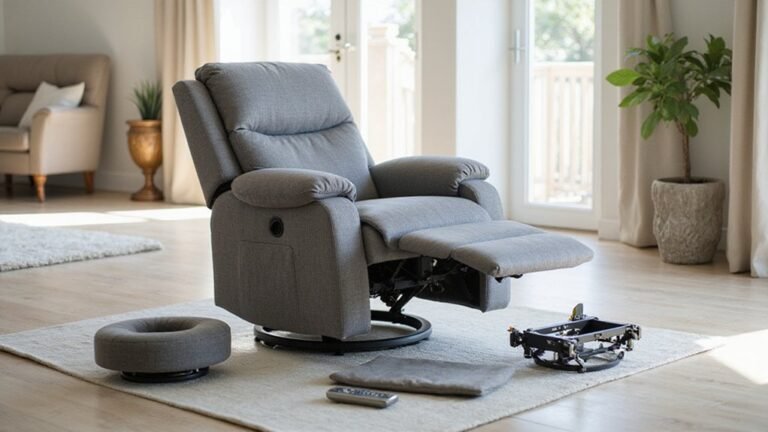
Start by clearing your workspace and gathering essential tools like screwdrivers, wrenches, and pliers. You’ll need to wear safety gear including goggles and work gloves before beginning. Document each step with photos, then disconnect power sources for electric models. Remove the backrest first by releasing the spring clips, followed by dismantling the base mechanisms while carefully organizing all hardware. Proper preparation and systematic disassembly will reveal the full process ahead.
Essential Safety and Preparation Steps
Five critical safety and preparation steps must be completed before disassembling a recliner chair. First, verify proper workspace preparation by clearing sufficient space around the recliner and removing potential tripping hazards. You’ll need adequate lighting and a stable, level surface for safe disassembly. Having the right tools and equipment ready, including screwdrivers, wrenches, pliers, and a rubber mallet, is essential for efficient disassembly. Many Ashley recliners have locking clips that secure the back panel to the base.
For electrical safety, disconnect all power sources if you’re working with an electric recliner. Switch off the power system and verify there’s no residual current using a voltage detector. Next, put on your safety equipment: goggles, heavy-duty gloves, and closed-toe shoes. Then, study your recliner’s mechanism and documentation, taking photos from multiple angles for reference. Taking special care with tension rods and springs will ensure proper reassembly later. Finally, prepare containers to organize removed parts, and label components with painter’s tape as you disassemble them.
Tools and Materials You’ll Need
With proper safety measures in place, gathering the right tools and materials becomes your next step in recliner disassembly. Tool selection tips focus on four essential categories: basic hand tools, protective gear, upholstery tools, and mechanical implements.
You’ll need a variety of screwdrivers (Phillips and flathead), wrenches (7/16″ and 3/4″), and Allen keys (4mm and 5mm) for basic disassembly. Safety gear recommendations include protective eyewear and work gloves to guard against sharp edges and flying debris. For upholstery work, equip yourself with a staple remover, utility knife, and wire cutters. Mechanical tools should include a socket set and specialty fastener drivers for mechanism removal.
Don’t forget organizational aids like plastic bins for hardware storage and a camera to document your progress. Using labeled bags to store and identify small parts during disassembly will make the reassembly process much easier. When working with the reclining mechanism, keep cable clips handy as they’re essential for maintaining proper tension during reassembly. A pull handle kit may be necessary if your recliner’s handle mechanism shows signs of wear or damage.
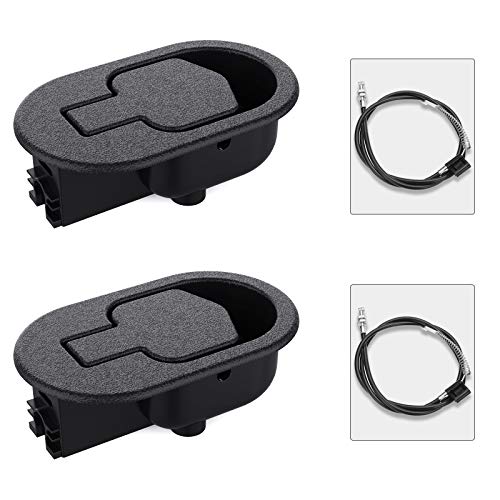
【BARIDWON Recliner Replacement Parts:】 Ideal for replacing worn-out and broken recliner handles and cables. Compatible with most major recliner sofa brands, like Ashley, Lazy Boy and more. (NOTE: Measure your original handles and cables to ensure compatibility before buying)

【Fit Main Recliner Sofa Furniture】: Ues for major recliner couch replacement kit includes recliner handles and recliner cables, it fits most recliner sofas furniture. (Note: Because there are many different models of recliner sofas in a furniture brand. (Please bought must be referring the size of your original handles and Exposed Length of cables)

Ekornes Stressless Wrenches
Step-by-Step Backrest Removal Process
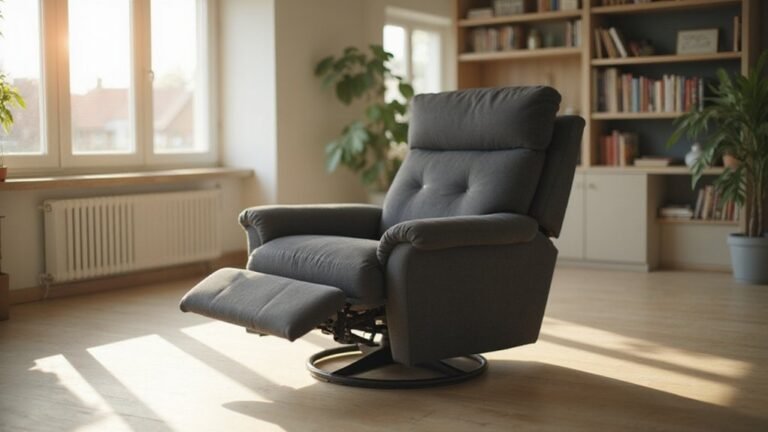
Before starting the backrest removal process, you’ll need to correctly identify and access the attachment points on your recliner chair. The backrest design typically features brackets on each side that slide into receptacle brackets connected to the reclining mechanism.
To remove the backrest, slightly lift or wiggle it to reduce pressure on the brackets. Then, locate the spring clips within each bracket and carefully pull them outward and upward simultaneously. You’ll need to maintain recliner stability by supporting the backrest with your body as you disengage both clips. Once released, slide the backrest upward to detach it from the bracket posts. Using your leg to provide supportive stabilization during removal can help prevent accidents.
For larger recliners, consider having someone assist you. Place the backrest flat on the seat once removed to prevent damage to the frame or fabric. Never force the backrest below its locked position as this could damage the brackets. If your recliner has outer fabric secured by staples or belts, loosen these first for easier access to the locking mechanisms.

Thickened high quality metal material, sturdy structure, durable and strong, not easy to corrode, can be used for a long time

8 gauge spring on furniture antique sofa or chair

REPAIR SET - Whether you are working on a new upholstery project or just looking to fix a seat on an antique sofa or chair, this sinuous spring repair set includes the basic parts you'll need. It includes 2 no sag springs, 8 spring mounting clips (s-clips), 16 screws, and step-by-step instructions for installation
Dismantling the Base and Mechanisms
Proper base and mechanism disassembly requires systematic access to the recliner’s underside components. You’ll need to carefully flip the chair and remove any fabric covers to expose the frame and base attachment points. Locate the symmetrically arranged fasteners using a strong light source. Regular visual checks of swivel plate operation help identify wear issues early. Take time to gently remove any seat decking staples to prevent damage to the upholstery.
Different mechanism types require specific tools, including Torx bits, wrenches, and screwdrivers. Document the position of all components before removal, particularly springs and tension rods connected to the base. For power recliners, disconnect electrical components first. Remove armrests by unscrewing their fasteners, then detach the footrest to access internal linkage points. Thoroughly inspect all loose brackets during disassembly to determine if tightening or replacement is needed.
Keep all fasteners organized and labeled, noting their original positions. Use protective gear and guarantee you’re working in a well-lit space with adequate room for maneuvering parts during disassembly.

Used to Allow Certain Chair Bases to Attach to Swivel Plate

Storage and Organization of Components
Successful storage and organization of recliner components begins with a systematic documentation process. You’ll need to photograph all parts from multiple angles before disassembly, creating a crucial reference for reassembly later. Implement component labeling by using painter’s tape and markers to identify each part’s location and function. Following the guide helps prevent missing critical steps during reassembly.
For storage solutions, use transparent containers and bags to organize hardware by type. Store screws, bolts, and washers separately in sealed compartments, and protect fragile components like springs in padded containers. Pay special attention to zig-zag springs as they’re critical for seat support. Regular mechanical inspections will ensure parts remain in good condition during storage. Place fabric pieces in breathable bags, and keep large components flat to prevent warping. Position your stored items in a climate-controlled area, and maintain all reference materials, including photos and manufacturer’s instructions, alongside the components for easy access during reassembly.