Ever wondered how to build a comfy recliner right in your own home? It’s more doable than you might think, especially if you’re comfortable working with wood and tools.
By following a few simple steps, you’ll end up with a custom chair that’s perfect for relaxing.
This guide walks you through every part of the process, from selecting materials to finishing touches.
Keep reading to learn how to create a sturdy, comfortable recliner that you’ll enjoy for years to come.
Choose Your Wood and Gather Essential Materials
To choose your wood and gather essential materials, start by selecting the right type of timber based on your desired durability, appearance, and budget. For a sturdy, long-lasting frame, opt for hardwoods like oak or hickory, which provide strength and resistance to wear. If you prefer a rustic look that highlights natural grain, consider ash, known for its attractive patterns and moderate durability. Softwoods such as pine or cedar are more affordable and easier to work with, making them suitable for beginners or projects where budget is a priority.
In addition to wood, you’ll need specific hardware to assemble your recliner, including wood screws, metal brackets for the mechanism, and wood glue for joint reinforcement. A range of tools is essential: a table saw for precise cuts, a drill press for making holes, and other hand tools like screwdrivers and clamps. If your design includes a reclining mechanism, take precautions similar to disassembling a power recliner by carefully planning the integration of any moving parts or electrical components, and be prepared to reset its mechanism if components become misaligned during assembly. Choose finishes like stain to bring out the wood grain or paint if you want a uniform color. Finally, gather sandpaper for smoothing surfaces and preparing the wood before finishing. As you remove hardware during test fittings, maintain an organized hardware collection for easier reassembly. All these materials and tools come together to ensure your project is solid, attractive, and lasting.
Measure and Cut All Your Chair Frame Pieces
Start by measuring your chair’s footprint, recording the front and back width, seat depth, and seat height. These dimensions define the overall size and help ensure your construction will fit the intended space. Additionally, measure the full reclined length to verify you have enough clearance for movement and comfort. Once you have these measurements, cut your plywood strips for the outer shell to precisely 4.5 inches wide and 4 feet long, giving your chair a sturdy and uniform exterior. For the inner frame, cut your posts and pine pieces to the exact lengths derived from your measurements, such as five pieces at 19 1/2 inches and six at 32 1/2 inches for a standard build. Proper cutting ensures a stable and sturdy structure. Planing these pieces beforehand ensures they are uniform and facilitate a smoother assembly. Sand all cut pieces before joining, as this makes finishing easier and enhances the fit of joints, leading to a cleaner, more professional finish. Accurate measurements and cuts are key to a properly fitting frame and future reinforcement, and you should also plan for accessibility to reclining mechanisms in case future adjustments are needed. Understanding common issues with manual recliners can help you design a more serviceable frame from the start. Considering the scale and proportion of your DIY recliner relative to your other furniture will ensure it harmonizes with your room’s layout.

【Birch Edge Banding Set】Includes one 50 ft x 3/4 inch roll of edge band with 0.6 mm thickness; perfect for restoring or enhancing cabinetry, furniture, shelving, and crafts
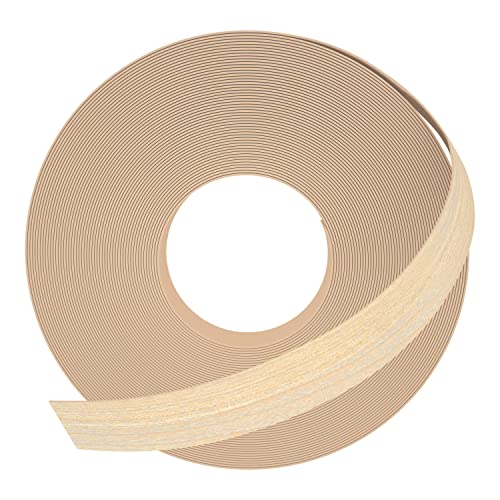
√【BRAND GUARANTEE】- GSCIT Club is a company specialized in Edge banding.

MATERIAL: Made of real maple wood, give a great finished look to your project
Assemble the Chair Seat and Attach the Front Legs
Start assembling the chair seat before attaching the front legs. Position the front legs at the front of the seat frame, ensuring the leg brackets align with the corresponding holes in the frame. For each leg, insert a bolt through a spacer, the leg’s bracket hole, and the seat frame hole. Then, add a second spacer and washer, threading on a lock nut to secure the connection. Initially tighten all bolts to about half of the recommended bolt torque. This loose tightening allows you to adjust the leg alignment easily. Place the chair on a level surface and check for wobble. Make small adjustments to straighten the legs if needed. Once the chair feels stable and steady, perform a drop test from a height of 30 to 50 centimeters to confirm stability before moving on. For mechanisms that require movement, you could later integrate a simple electric motor system. Remember that, unlike a standard power recliner, your DIY chair will not rely on a battery backup system. Always conclude assembly by performing a final stability check to ensure all components are secure. All screws should be tightened securely to prevent loosening over time.

Front Leg Replacement Support: Designed to replace compatible front leg brackets on zero gravity recliners, helping restore structural support and stability

Replaces a Lost or Broken Front Bracket – Designed as a direct replacement for the front leg bracket on z g lounge chairs.

【Complete Repair Kit】Each set includes 4 mounting plates and 12 screws to ensure a secure fit
Install the Seat Slats With Perfect Spacing
To install the seat slats with perfect spacing, start by measuring the distance between the posts and the width of a single slat. Use this measurement to calculate the gap needed for even spacing with a simple formula: subtract the total width of all slats from the span between the posts, then divide that number by the number of gaps (which is one less than the number of slats). Before proceeding, assess the chair’s structural integrity to ensure a solid foundation.
Cut a spacer block to this exact measurement; this will help you maintain uniform gaps throughout. Begin placing the slats at the front, making sure each one is square before moving on. Follow the downward slope of the seat, positioning each slat accordingly. Work outward from a centered reference point to keep the spacing consistent. To simplify the process, you can use household objects of the same size as temporary guides on each side. If you later add a motorized recliner mechanism, be prepared to troubleshoot it by carefully testing components individually. Hold them in place while securing each slat with glue and screws for precise, evenly spaced results. Maintain pressure on the chair and spacers during assembly to keep components from shifting. For advanced comfort and convenience beyond a basic build, consider integrating a dual power recliner mechanism later.

Package Include: 15 PCS square wooden dowel rods, each dowel rod is 1/2 inch thick by 1 inch wide and 6 inch long

70mm Bed Slats Holders for Wooden Frames

100mm Bed Slats Holders for Wooden Frames (25mm Depth)
Create the Comfortable 15-Degree Backrest
The optimal backrest angle for comfort is exactly 15 degrees from vertical. This recline creates an included angle of about 100 to 110 degrees, which is ideal for lounging. Such a position helps reduce pressure on your intervertebral discs and enhances overall comfort. To achieve this, construct a sturdy frame precisely at this angle to maintain consistent support. When designing the backrest padding, use a two-layer system: a firm bottom layer for structural support and a softer top layer for immediate comfort. This combination provides much-needed lumbar support, preventing sinking too deeply and helping cradle your lower back. Keep the padding thickness between 1.5 and 2 inches, with increased firmness towards the back of the cushion to better support the lumbar region. For future maintenance or access, consider designing a backrest that can be detached by disengaging securing clips, similar to many commercial recliners. Choosing durable materials like a hardwood frame can help ensure your DIY recliner achieves a typical lifespan. Should any mechanical issues arise later, such as a stuck recline, you can reference DIY troubleshooting guides for identifying common problems.
Attach the Backrest and Add Armrests
To securely fasten the backrest and armrests for lasting comfort, follow precise steps to ensure stability and proper alignment. First, attach the backrest by sliding its metal guides into the receiver clips on the base. Press down firmly until you hear a locking click, confirming it’s securely in place, and ensure the two metal connectors are fully engaged in their slots. Next, connect the backrest to the seat arms by guiding the coupling bolts over the assembly pins and rotating the locking rings forward to lock them in position. This connection is a bracket and clip system commonly used for easy disassembly.
For the armrests, attach supports to the frame using screws. Carefully align all holes to prevent damaging the material or misaligning parts. Start by tightening the screws only partway, leaving them slightly loose. Once you verify that the armrests are level and the backrest is upright and stable, tighten all screws fully. This process is similar to how you would later remove the back panel for maintenance or moving. Consider choosing durable and easy-to-clean upholstery like microfiber or leather for the final covers to match your comfort preferences. Finally, secure cushions with zippers, straps, Velcro, or snaps to complete the assembly. These steps help ensure the furniture remains sturdy and comfortable over time.
Sand Your Chair for a Smooth Finish
Thoroughly sanding your recliner creates a smooth surface that’s essential for a flawless finish. Begin with an 80-grit paper to remove surface defects such as scratches, dents, or peeling finishes. Progress through a 120-grit paper to refine the surface and eliminate deeper scratches, and finish with a 320-grit for a fine, even texture. Always follow the wood’s grain direction with your sanding strokes to avoid leaving visible scratches that can telegraph through your paint or stain. Examine the surface closely to ensure you are working with real wood grain and not a veneer that could be damaged by over-sanding.
For large, flat areas, use a random orbital sander to maintain consistency and save time. For rounded spindles and curves, switch to a sanding sponge, which provides better control and access. As when safely transporting furniture, it’s wise to use protective equipment; wear gloves to improve your grip and prevent splinters. This careful preparation, like choosing quality materials, extends the life of your furniture, as power recliners made with durable hardwood frames can last significantly longer. Use light pressure during sanding to prevent gouging the wood and make slow, overlapping passes to ensure even coverage. Hold your tools flat against the surface to avoid uneven wear that can create dips or ridges.
Between each grit change, vacuum the dust thoroughly and wipe the surface with a tack cloth to remove residual particles. After completing the sanding process, inspect your work under a raking light, which casts shadows and reveals any missed imperfections or scratches that need additional attention.
Apply a Protective Finish for Outdoor Use
After sanding your recliner smoothly, the next step is to apply a protective finish suitable for outdoor use. Start with a penetrating oil; use a brush to ensure a uniform coat and wipe off any excess after 20-30 minutes to prevent sticky buildup. Seal the end grain with a clear epoxy sealer to prevent moisture from penetrating the wood. To achieve a durable, weatherproof layer, apply two coats of outdoor paint over a primer, allowing each coat to dry thoroughly. Follow with a top layer of spar varnish, which is marine-grade and remains flexible as the wood expands and contracts with temperature changes. Lightly sand the surface between varnish coats and apply three coats in total. Allow each coat at least 24 hours to dry before applying the next. After finishing, let the entire coat cure fully for about 30 days before regular use to ensure optimal protection. To maintain your recliner’s outdoor resilience, touch up the oil annually and reapply the varnish every few years as needed, as regular maintenance is essential to combat sun, rain, and freeze-thaw cycles affecting durability.