Dealing with a recliner that won’t move can be frustrating. You might wonder if it’s a simple fix or something more complicated.
Usually, a stuck recliner can be resolved with a few basic steps, whether it’s manually or electronically operated.
Below, I’ll walk you through how to troubleshoot and fix common recliner issues so you can get comfortable again.
How to Diagnose Your Stuck Recliner
To diagnose a stuck recliner, start by visually inspecting for obstructions. Check the footrest channel for foreign objects like toys, debris, or tangled fabric that could block movement. Look for bent or broken metal frames, misaligned rails, or loose hardware that might prevent proper operation. Make sure to check and tighten any loose screws or bolts on the rocking or swivel mechanisms, as this can also cause instability and hinder operation. If your chair is motorized, examine the wiring for signs of tangling, fraying, or disconnection. Always unplug the recliner before inspecting it to ensure your safety and prevent electrical shocks. For a motorized chair, a critical first step is to check the power supply, confirming it is plugged in and providing the correct voltage. Selecting a recliner that matches your room’s existing design style can also influence its long-term mechanical reliability by ensuring proper clearance and usage. If you’re unsure about what you’re seeing, contact the manufacturer’s customer service; they can often guide you through a safe visual check over the phone. This quick, on-the-spot inspection can reveal obvious physical blockages or damage, saving you time before considering more involved internal repairs. You can also refer to the manufacturer’s disassembly guide for detailed diagrams of how the chair should look when properly aligned.
Clean and Lubricate Your Recliner’s Mechanism
Cleaning and lubricating your recliner’s mechanism can often resolve issues caused by blockages or misalignments. First, place a drop cloth or old sheet underneath to protect your floor. Tip the chair backward or to its side to access the underside easily. Use a vacuum to remove all visible dirt, dust, and debris, especially around hinges and moving parts. A soft brush can help loosen stubborn dirt on hinges and joints.
Next, remove old grease from joints and tracks using a clean rag. Wipe the metal parts thoroughly with a damp microfiber cloth, then dry everything completely to prevent rust. For lubrication, choose a silicone-based spray or white lithium grease. Apply it sparingly to all pivot points and use the spray’s straw for tight spots that are hard to reach. Work the mechanism repeatedly to distribute the lubricant evenly through the joints and tracks. Afterward, wipe away any excess to prevent dirt and dust from sticking. This regular maintenance can also prevent future issues with the rocking and reclining mechanisms.
This process not only frees up a stuck recliner but also helps with cable management by removing debris that could obstruct movement. It also provides an opportunity to perform minor cosmetic touch-ups as you clean the frame, maintaining the chair’s overall appearance and function. Whether you have a standard model or a specialized lay-flat recliner, regular maintenance is essential for smooth operation. Regular maintenance can extend your recliner’s lifespan and keep it operating smoothly, much like the careful upkeep recommended for more advanced chairs with electric lifting mechanisms.
![WD-40 Specialist Silicone Lubricant, New Bigger Can, 13.3 OZ [1-Pack]](https://m.media-amazon.com/images/I/41MHMrtuoWL._SL500_.jpg)
RELIABLE LUBRICATION: Provides smooth, reliable lubrication without attracting dirt or debris for a cleaner operation.
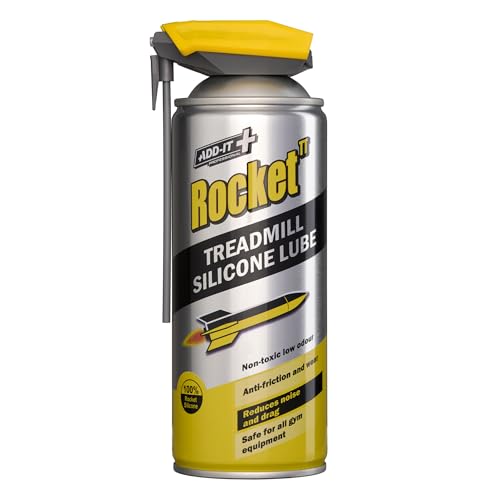
100% SILICONE PERFORMANCE FORMULA: High-grade silicone lubricant designed for smooth, consistent treadmill belt movement with reduced friction.

ENHANCE PERFORMANCE - B'laster Silicone Lubricant contains a higher concentration of silicone than competitor brands, which provides longer-lasting lubrication.
Tighten All Loose Recliner Screws and Bolts
Begin by flipping the chair onto a soft blanket to access its underside. Examine all visible screws and bolts, focusing on those that wobble or feel loose. Use a screwdriver that fits each fastener perfectly or an adjustable wrench for bolts. Tighten each fastener clockwise until it is snug, but avoid over-tightening to prevent stripping the threads. After tightening, apply a small amount of thread locker to the threads of each bolt to prevent them from loosening again over time. This maintenance routine helps support the overall longevity of power recliners by keeping its frame stable. Properly secured fasteners are crucial for maintaining cushion adjustment and fabric tension by stabilizing the frame. If you are troubleshooting, remember to always start with these simple fixes before assuming a major component has failed. It’s also helpful to understand whether your chair uses a pull handle system or a cable release system, as this knowledge guides more complex repairs. After tightening, test each section’s stability by gently applying pressure. If you encounter a screw that spins loosely and cannot be tightened further, replace it with an identical part to ensure a secure and durable fix.

Threadlocker: Thread locker has strong adhesion and can fix screws, nuts, and metal fasteners to prevent loosening due to vibration

Great value 2-pack threadlocker: This kit includes a medium-strength blue threadlocker and a high-strength red threadlocker to easily meet different needs. Blue is suitable for removable screw connections, red is suitable for permanent fixation. Whether it is automotive repair, home assembly or industrial applications, our thread lock is ideal for you

VALUE 2 PACK THREADLOCKER: Our medium-strength blue threadlocker and high-strength red threadlocker, which can meet your various needs!
Fix a Jammed Ratchet Mechanism
Flip the chair to access its underside. Locate the release rod and the ratchet teeth, which are key to fixing the jam. Pull the release rod while gently rocking the chair base to disengage the jammed pawl; keep your fingers clear as it may spring loose. Use a towel to wipe away any debris from the teeth and pawl, which is essential before any upholstery repairs or cleaning. After servicing the mechanism, a machine washable cover can help keep it clean. If the handle is non-responsive, check for loose cable connections or a loose bolt and nut on the lever mechanism before proceeding. On a power recliner, a similar failure to respond often indicates an issue with the electric motor or its wiring. Always verify the power supply first to rule out a simple electrical fault. Apply a small amount of lubricant to these dry parts, then rotate the footrest to help distribute the oil evenly. Reassemble the mechanism and test that the pawl moves freely to ensure proper function.

If your Lazy Boy recliner is intermittently dropping down a few notches or will not maintain elevation then these are the parts you need to fix the issue.
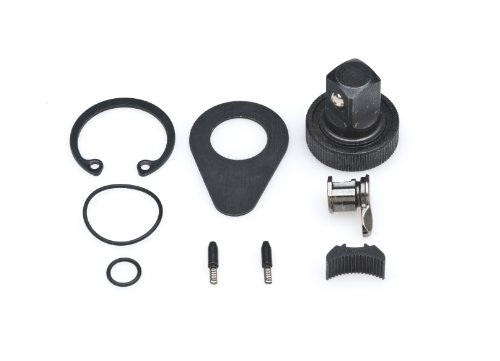
For non-roto ratchets

This is the appropriate ratchet repair kit for Williams 3/8 Drive Enclosed Head Ratchets
Inspect and Replace Broken Recliner Springs
To inspect and replace broken recliner springs, start by turning the chair upside down to access the frame easily. Locate the springs near the footrest area and examine their condition carefully. Look for springs with broken coils, disconnected ends, or signs that the spring is overly stretched or deformed. This is a common issue that can be addressed with DIY fixes for footrest troubles. If you find any damaged springs, you’ll need to remove them safely. Use pliers or a spring hook tool to carefully unhook the spring from its clamp, relieving any tension. When installing a new spring, attach it securely to the frame first, then fasten it into the clamp. After replacing the spring, turn the recliner upright and test its stability and support before using it again. A machine-washable slipcover can also protect your refreshed furniture from future wear. Proactive maintenance like this is key to achieving the long lifespan of quality sofas outlined by experts. Always wear eye protection when handling springs due to the risk of snapping or recoil.

【Stainless Spring】6-1/4 inch recliner springs replacement sofa chair bed mechanism tension stainless chaise longue springs long neck hook style 2 PCS

Product size: Total length: 3-5/8 inches (measured from hook to hook as 3.46 inches), coil diameter: 13/20 inches, coil body length: 1-13/22 inches, wire diameter: 2mm, hook angle: 45 degree deflection
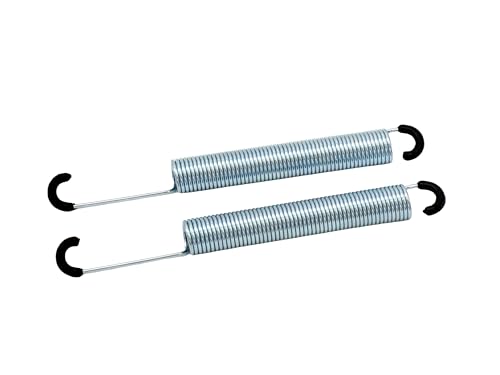
Mechanism assist / lock / tension spring.
Adjust Your Recliner’s Tension Knob
To adjust the tension knob of your recliner, locate the mechanism beneath the seat frame. You may need to tip the chair forward to access it. Find the tension adjustment knob, wing nuts, or thumb screws. To make the chair more resistant to reclining, turn these clockwise; to ease the resistance for smoother reclining, turn them counter-clockwise. Adjusting the tension can also help prevent accidental movement to keep your recliner securely in place. Make small, equal adjustments on both sides to keep the balance. Always adjust both sides to ensure balance and test the footrest for proper function after each change. Sit in the chair and lean back after each change to test the firmness. If tipping the chair does not provide enough access, you may need to disassemble the recliner back for better reach. For more complex issues like a broken handle, you may need to remove seat covers to access and inspect the internal reclining mechanism. Repeat this cycle of adjustment and testing until you reach your preferred level of comfort, ensuring the chair feels stable and does not tilt sideways.
Reset an Electric Recliner’s Motor
To reset your electric recliner’s motor, start by locating the reset button, typically found on the control panel or beneath the armrest. Unplug the chair from the wall outlet before proceeding. Use a paperclip to press and hold the reset button for about ten seconds. For a more thorough reset, unplug the small DIN connector that connects directly to the motor and hold it unplugged for 20 seconds before reconnecting it firmly. Connection Inspection involves checking all DIN plugs into the motor to ensure they are fully re-inserted into their sockets. After reconnecting everything, plug the chair back into a verified, live outlet. Wait at least one minute to allow the system to reset, then test the recliner’s functions. This process often clears any faults and enables the motor to recalibrate properly. As part of your mechanical upkeep, regularly inspect power mechanisms for loose wires or obstructions to prevent future issues, and familiarize yourself with the recliner cable mechanism for related manual repairs.
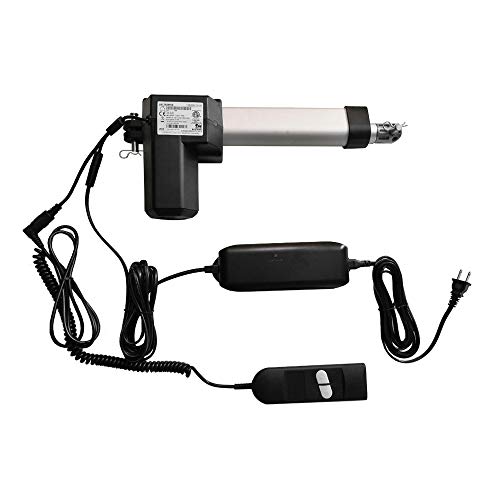
DeltaDrive1.28.000.131.30 Recliner Motor, Check Label Before Ordering

【Power Specification】: Input: AC 100-240V, 1.5-2.0A, 50/60 Hz. Output :DC 29V/24V 2.0A. Power Adapter Almost compatible with most brand recliners: Switching power supply transformer fully compatible with OKIN, Limoss and Tranquil Ease Lift Chair and Power Recline DeltaDrive and BetaDrive Motors with a two pin (flat & round) connection to the motor.

RMT Recliner Motor Actuator Replacement Model R811A R811A32375198 KIT made by RMT
Straighten Bent or Misaligned Parts
To straighten bent or misaligned parts, start by carefully inspecting the mechanism with a flashlight. Look for any signs of metal deformation in the scissor arms and tracks. Before making any adjustments, take photos of the current cable routing to serve as a reference later. Use adjustable pliers to gently bend warped components back into their proper alignment. Work slowly and incrementally to avoid over-stressing the metal. After each adjustment, recheck how the parts fit and move. Lay the mechanism flat on a stable surface and use a hammer behind it to carefully straighten any remaining bends. Tighten all connecting bolts securely to ensure the frame is stable and that tracks seat properly. If you find any parts that are cracked or too severely bent to repair, replace them with exact matches for your model to ensure proper function.
Test Your Recliner’s Full Functionality
After straightening bent or misaligned parts, you need to test your recliner’s full functionality. Begin by returning it to its upright position. Then, perform a complete operational cycle: press the recline button and observe the mechanism move smoothly. Ensure nothing snags on the recliner upholstery, and listen for any unusual grinding or straining noises. Press the close button to return it upright, paying attention to whether the cushion padding compresses and releases without obstruction. Test each control button multiple times to confirm consistent operation, and verify a sufficient power supply of 28-29 volts to ensure full operation. Finally, sit in the chair and apply your weight through the full range of motion. This final step verifies that all internal repairs are secure and that the recliner functions safely under normal use, signaling that the job is complete.