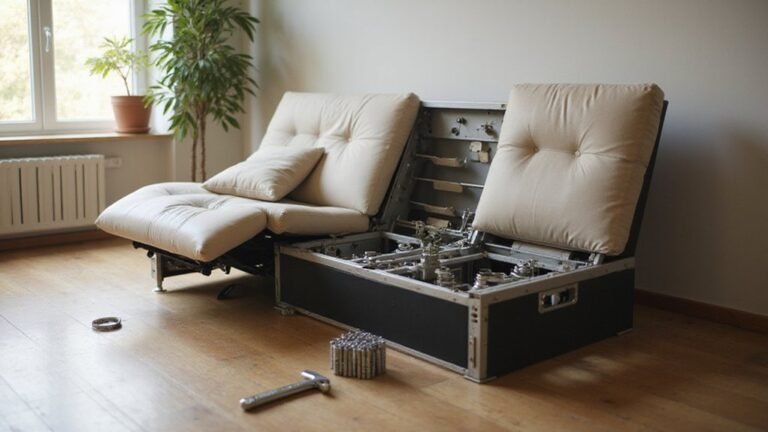
Wondering how to give your recliner a fresh new look without buying a new one? Reupholstering can be a straightforward and rewarding DIY project, saving you money and extending the life of your chair.
By the end, you’ll know how to carefully strip away the old fabric, select durable new material, and reassemble your recliner to look polished and feel comfortable.
The full steps are just below to help you get started.
How to Gather the Right Reupholstery Tools
To reupholster your recliner effectively, you need a specific set of tools for fastening and removal. Start with a heavy-duty staple gun, especially if your fabric is thick, to ensure secure attachment. For removing existing material, a tack puller works well to lift staples or tacks without damaging the frame. Pair it with a flathead screwdriver and needle-nose pliers to pry out staples and remove stubborn tacks efficiently. This is similar to the disassembly process for a reclining sofa, where tools like screwdrivers and pliers are essential for removing fasteners. A careful, methodical approach to disassembly is key, similar to the troubleshooting steps for isolating electrical faults in a recliner mechanism.
To align your new upholstery, gather T-pins for temporarily holding fabric in place, along with a reliable tape measure and a metal ruler for precise measurements and pattern alignment. Use heavy-duty scissors or a rotary cutter to make clean, accurate cuts that match your fabric pattern. Before applying your final fabric, it’s wise to perform a spot test to ensure your cleaning solution or any pre-treatment won’t cause damage.
Organize your workspace with safety gear like a drop cloth and a sturdy workbench. This prevents damage to your floor and provides a stable surface for working, making your project smoother and safer from start to finish.

Easy to Use - Steel handle with over-molded grip to help provide comfortable usage and easy operation. Bottom load design and a steel magazine for quick and easy loading.
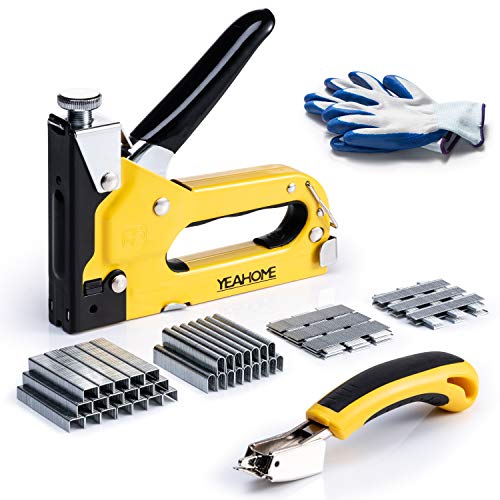
Versatile Fastening Tool - YEAHOME 4-in-1 Staple Gun accepts D-shaped, U-shaped, T-shaped, and Pin Staples. This kit comes with Remover, Gloves, 2000pcs of each 7/16" D-Type and 1/2" U-Type , 1000pcs of each 3/8" T-Type and 5/8" Pin Brad Nails for a wide variety of applications: general DIY repairs, crafting, decorating, upholstery projects, roofing, and more.

3-in-1 Application : It fits 3 kinds of different staples/nails such as D type staples, U type staples and T type nails; It's suitable for general models: T50, T18, Brad nail gauge 18
How to Strip the Old Fabric From Your Recliner
To strip the old fabric from your recliner, start at the back panel. Use a screwdriver to slide under the seam and carefully remove the staples holding the fabric in place. For a more effective removal, use dull side cutters to twist and pull stubborn staples without cutting the fabric. Label this fabric as piece two and make note of any fold lines before proceeding. Next, detach the arm panels and interior layers one by one, labeling each as you go to keep track of their order. If your recliner has a separate backrest, you may first need to detach the locking mechanisms to remove it from the main frame for easier access. This is a good opportunity to inspect and, if necessary, address any malfunctioning levers or other mechanical issues before reupholstering. Finally, unzip the seat cushion covers and remove the deck fabric to access the internal components, allowing you to inspect for common mechanical issues like damaged springs or loose hardware. Taking your time and staying organized will make the reupholstering process much smoother.
How to Clean and Inspect Your Recliner’s Frame
After removing the old fabric, thoroughly clean and inspect the exposed frame to ensure it is in good condition. Start by vacuuming the entire area, using a crevice tool to reach into joints and mechanisms and remove all dust and debris. Next, examine the wood carefully for any cracks or splits, and check the metal components for rust, corrosion, or bent parts. When inspecting, also ensure all cam locks and base springs are intact and functioning properly. Tighten all screws and bolts, making sure everything is secure. Testing the recliner’ s mechanism through its full range of motion is crucial—listen for unusual noises or resistance that could indicate problems, and be sure to verify the operation of the recliner motor port if your chair is electric. For electric models, you can troubleshoot issues with the recliner control system by checking the power supply and connectivity before proceeding. Any loose parts should be tightened immediately, and areas showing signs of damage or wear must be reinforced before moving on to cutting and attaching new fabric. This step ensures the frame is stable and ready for refurbishing, preventing future issues and prolonging the life of your recliner.
How to Cut Your New Fabric for a Perfect Fit
To cut your new upholstery fabric accurately for a perfect fit, start by considering the fabric grain. Lay the fabric so the grain runs vertically on major sections, which helps prevent distortion when shaping the fabric around curves. Transfer your measured patterns onto the fabric’s wrong side using chalk, ensuring your lines are clear and precise. Always include a generous seam allowance of at least two inches beyond your markings; this extra fabric is essential for fitting and wrapping around edges. When cutting, use sharp shears and work on a stable surface for clean, straight lines, and protect your table with a sturdy MDF board as a cutting surface. Only cut multiple layers if you have perfectly aligned the fabric grain and weight, to avoid uneven cuts. After cutting, compare each piece to your chair’s dimensions, trimming any uneven edges lightly. Investing in a high-quality fabric can enhance your chair’s average lifespan, helping your newly reupholstered recliner remain durable for years. It’s wise to first review the disassembly process for your specific chair model to understand how pieces like the back panel detach and ensure your fabric sections align correctly. Label each section clearly and store them flat to keep their shape until you’re ready for assembly.

ULTRA SHARP FABRIC SHEARS: Made of high carbon steel which is stronger than stainless steel, the craft scissors have great qualities including good edge retention and ability to make clean cut through multiple layers of fabric.well worth investing to help you cut down on time and money and perfect your sewing creations.

HIGH CARBON STEEL - Scissors made of high-carbon steel are both durable and sharp, making them more effortless and precise when cutting various fabrics. The carbon steel is easy to grind and can still be sharpened with a Water Stone after long-term use

#1 SHARPEST FABRIC SCISSORS THAT LAST – Tired of tailor scissors that go dull? Unlike sewing shears that may look similar, our right-hand scissors heavy duty are made from Forged Premium High-Carbon Steel, which makes them stronger, sharper and more durable. The Precision-Ground Blades slice smoothly through fabric, leather, and the toughest materials, delivering Top-Notch Performance.
How to Staple and Stretch Your New Fabric
To staple and stretch your new fabric properly, start by anchoring it at the center of one side with a single staple, ensuring it remains taut. Next, pull the fabric directly across to the opposite side and secure the center with another staple, maintaining high tension. Continue working outward from these center points toward the corners, placing staples every few inches along the frame edge with consistent spacing. Before each staple, pull the fabric tight to prevent sagging or wrinkles. Remove staples early to facilitate adjustments and prevent permanent misalignment. Remember that a smooth fabric surface is important for comfort, much like the quiet operation of the power recliner motor during use.
When reaching the corners, pull the fabric at a 90-degree angle, fold any excess neatly underneath, and staple it in place. This technique helps create clean edges and prevents puckering. For ultimate relaxation after your project, consider upgrading to a chair with independent backrest and footrest adjustments. Choosing the right upholstery type from the beginning will make this process easier and ensure long-lasting results. After securing all sides, gently inspect the entire surface. If you notice any loose areas, remove the affected staples, stretch the fabric tighter, and re-staple to achieve a smooth, professional finish.

[Powerful and Light] As an industrial pneumatic upholstery stapler with powerful performance, it has a weight of 2.05 lbs, making the operation more flexible and convenient. (Need to use with an air compressor)

[Pneumatic Stapler] The upholstery staple gun requires use with an air compressor (recommended use at 70 - 90 PSI) but the compressor is not included. Additionally, the air inlet is a fixed standard 1/4" NPT fitting, designed for optimal performance and to prevent air leakage.

Professional pneumatic power for consistent results — Steady driving force handles high-volume upholstery and woodworking jobs without jamming. Connect it to an air compressor (not included) and you're ready to work.
Common Reupholstery Mistakes and How to Avoid Them
To avoid common reupholstery mistakes, it’s essential to pay close attention to fabric pattern alignment. Large prints require careful planning so that patterns match seamlessly at seams, avoiding visual breaks that can detract from the finished look. Always buy extra yards of fabric ahead of time to ensure you have enough for matching patterns across different sections. Proper structural preparation is crucial—inspect and repair the frame before starting, and remove old staples to prevent bulges under the new fabric. A thorough inspection should include checking for broken springs or bent mechanisms common in recliners, which should be repaired before reupholstering to ensure proper support and function. For sagging seats, you can often replace zig-zag springs yourself to restore firmness. For reclining mechanisms, test the pull cable for smooth operation, as a simple replacement is a cost-effective DIY repair. Before cutting new fabric, use the old pieces as patterns and clearly mark their orientation to prevent assembly errors. Take your time stapling, working from the center outwards to keep tension even and avoid wrinkles or slack. Achieve professional-looking edges by mastering finishing techniques such as folding corners precisely and adding welt cord or trim to conceal staples. Sloppy edges are quick giveaways of amateur work. Lastly, choose a durable fabric with the right weight and fiber content for your chair’s daily use, ensuring your reupholstery lasts without sagging or tearing.
How to Reassemble and Test Your Recliner
After ensuring the new upholstery is smooth and secure, start reassembling your recliner by aligning and connecting its main structural parts. First, slide the backrest into place, paying close attention to the fabric at its brackets to avoid pinching material. Secure the brackets firmly, making sure the fabric remains smooth and unwrinkled. During this step, ensure the recliner’s metal parts are straight and not bent, as this can prevent improper function. Reattach all labeled hardware, such as screws and bolts, tightening armrest bolts and footrest fasteners securely to ensure stability. Check for and tighten any loose hardware to prevent future leaning or instability. Then, adjust the cushioning by confirming that both seat and back cushions sit flat and do not shift or create lumps. As part of regular maintenance during reassembly, lubricate moving parts to maintain smooth operation and ensure the chair’s longevity. If your chair is a power recliner model, remember to reconnect its power source, whether a wall plug or a rechargeable battery pack, before final testing. Inspect the upholstery for a neat, finished appearance, smoothing out any wrinkles or misaligned seams. Finally, test the recliner by operating the lever to check for smooth motion through its full range. Verify that the chair locks securely in both upright and reclined positions by checking the locking pawls, listen for any unusual noises, and ensure the footrest retracts smoothly and flush with the chair frame.
Troubleshooting Reassembly and Mechanism Issues
If your recliner isn’t functioning properly after reassembly, the most common issues usually involve misaligned parts or loose fasteners. Start by inspecting your frame reinforcement. Ensure all frame components are correctly aligned and that bolts are fully tightened to prevent wobbling or leaning to one side. Misaligned tracks can also block the footrest from moving smoothly, so verify their positioning and correct any misplacement.
Check the lever placement and internal mechanisms. A handle installed backward or a missing locking pin can cause jams or failure to lock in certain positions. For powered recliners, confirm that the motor carriage is centered and that limit switches are functioning correctly. Periodic inspections can help catch potential issues early and prolong your chair’s life. Proper lubrication of pivot points is essential for smooth movement; apply a light silicone-based lubricant but avoid excess, which can stain upholstery.
Finally, pay attention to fastening hardware. Over-tightening fasteners can crack or deform parts, while under-tightening creates instability. Manage cables and wires carefully during reassembly to prevent disconnections, which can interfere with smooth operation or trigger safety features. Taking these steps will help restore your recliner’s proper mechanism performance.
When to Call a Professional Upholsterer
You should call a professional upholsterer when faced with major structural issues, such as a cracked frame or a broken reclining mechanism. These repairs require specialized tools and expertise to ensure safety and durability. Attempting to fix these on your own can lead to further damage or safety hazards. For high-value or sentimental vintage pieces, hiring a professional is essential to preserve their integrity and value. Complex fabrics, intricate designs, or electrical components in power recliners also demand expert handling to avoid damaging delicate elements. If you lack the necessary tools, time, or confidence, or want the assurance of a high-quality finish, seek out an upholsterer with certification. This ensures your project will be handled with proper materials and craftsmanship, protecting your investment.