A squeaky recliner can be pretty frustrating, especially when you’re just trying to relax. Luckily, fixing that noise often doesn’t require a handyman—most problems are easy to solve at home.
By identifying the source and following a few simple steps, you can quiet your chair and enjoy peaceful sitting again.
In this guide, you’ll learn how to locate the squeak, tighten loose parts, apply lubricant, and inspect critical components. Keep reading to discover how to make your recliner stop squeaking and keep it smooth for years to come.
Find The Exact Source Of The Squeak
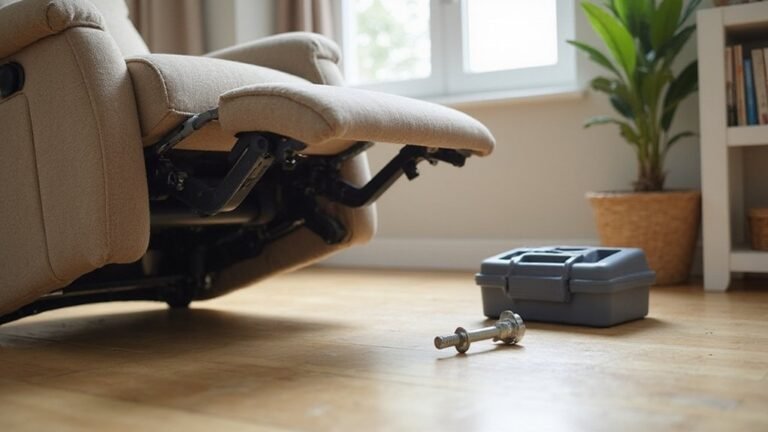
To find the exact source of a squeak in a recliner, start by listening carefully as you slowly recline the chair. Focus on identifying the sound’s location and nature. Is it a high-pitched squeak caused by friction at a joint, or a low clunk from the mechanism? Tip the chair onto a protective sheet to inspect the underside thoroughly. Check all metal linkages and pivot points for looseness and wear marks that indicate rubbing or friction. During this inspection, also check for loose screws or bolts that could be causing misalignment and noise. A primary area to check, especially on rocking recliners, is the rocker springs and base, as their interaction is a common source of noise. Rock the chair firmly to scan for vibrations, and pay attention to where they are most intense. Squeaks from hinges usually stem from dry or worn joints, while creaky upholstery often results from fabric rubbing against the frame. Applying a proper lubricating oil to these moving parts can often silence them immediately. Remember that these moving parts can also lead to reduced durability, which is a common complaint with recliner mechanisms over time.
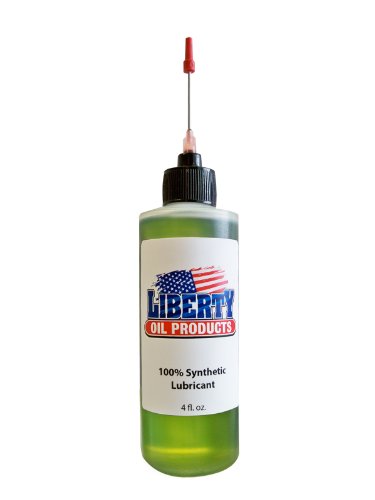
Protects, Cleans, and Lubricates Wheel Bearings

This 100 % synthetic all purpose oil is engineered to outperform traditional lubricants. The molecular structure of Versa Oil gives it a wider temperature range than other common lubricants. This helps to prevent sludge from building up over time and keeps your equipment functioning smoothly.
Tighten Every Screw And Bolt
Once you’ve identified the squeak’s source, the next step is to systematically tighten every screw and bolt you can access. Proper tool selection is crucial to avoid damaging the fasteners or the chair itself. Use a Phillips screwdriver for cross-head screws found on the frame or armrests. For hexagonal bolts, an Allen wrench is appropriate. A socket wrench works well for deep-set fasteners that are harder to reach, such as those found when you disassemble the backrest for a thorough inspection. Be careful not to overtighten: tighten screws until they are snug, then stop once the threads start to bind. Over-tightening can strip threads or crush components, leading to more issues. Make sure to check every connection—from the base bolts to the nuts on the reclining mechanism. Finally, test the chair’s stability by gently rocking it. If it feels secure and no looseness remains, you’ve successfully tightened all the fasteners. It also helps prevent mechanical strain on cables and other components that can cause future failures. For recliners, also inspect for worn-out bushings that may require replacement if tightening alone doesn’t resolve the instability.

【PREMIUM MATERIAL】 Heat-treated steel with black-oxide finish, featuring 15 long reach keys and 15 high leverage short keys for durability and strength.

Folding allen wrench set Perfect Gift for Dad,Friends, Husband, DIYer.Fathers day gifts for him,christmas gifts for him.It is a good bottle opener.

26-piece long-arm hex key set for quickly tightening or loosening fasteners; standard and metric sizes
Apply Lubricant To Key Moving Parts
Apply lubricant directly to the moving parts. Choose your lubricant carefully: use a light oil like Three-in-One for pivot points and bolts, silicone spray for tight joints, and white lithium grease for slide tracks and springs. Avoid using WD-40 on wheels and petroleum-based grease near plastic components. Before lubricating, you may need to access the mechanism by safely removing the recliner back panel. If you experience a complete failure of the motorized function, such as during a power outage, consult specific troubleshooting guides for safe manual overrides. Regular maintenance of the motorized components can help ensure your power recliner reaches its typical 7 to 15 year lifespan.
To apply, drip small amounts precisely onto each pivot, bolt, and hinge. Place a cloth behind joints to catch drips and prevent staining. Never spray lubricant broadly; instead, carefully target each part to avoid overspreading.
After applying, work the mechanism by reclining the chair several times. This movement helps distribute the lubricant evenly into all crevices. Once done, wipe away any excess with a dry cloth to keep the area clean and prevent messes.

ENHANCE PERFORMANCE - B'laster Silicone Lubricant contains a higher concentration of silicone than competitor brands, which provides longer-lasting lubrication.


Lubricates, waterproofs and protects
Treat Squeaky Wood And Leather Surfaces
To treat squeaks from wood and leather surfaces, start by addressing the contact points. For wood, apply white lithium grease or silicone spray to joints where movement occurs, similar to lubricating the motorized recliner mechanism on power models. Alternatively, sprinkling baby powder into wood-to-wood contact areas can reduce friction. Rub it in well with a cloth and allow it to settle before use. Before applying lubricants, it’s wise to check the chair’s structural integrity to ensure the noise isn’t from a broken component. For leather surfaces, begin with a thorough cleaning of the frame to remove dust and dirt, then apply a leather conditioner. Conditioning keeps the leather soft and prevents stiffness that can lead to noise. Prior to conditioning, remember to perform a spot test on an inconspicuous area to ensure compatibility and prevent damage. For a quick and immediate solution, you can apply talc (baby powder) to lubricate the leather and eliminate squeaks by reducing friction. You can also spray silicone on areas where leather rubs against other surfaces. For spots where wood and leather contact directly, place a fabric barrier or apply a small amount of clear mineral oil to the wood edges. Let all treatments dry completely before using the furniture again to ensure their effectiveness.

12 percent silicone formula creates durable, long lasting waterproof bond to repel water, dirt and oil

Guards against water marks, drying, fading, cracking and discoloration from UV exposure; cleans dirt and grime and conceals fine surface scratches leaving a natural luster and shine

Versatile Acrylic Wax Finish: Fiebing's Leather Sheen Acrylic Finisher provides a high gloss, flexible, and durable protective finish for smooth leather items like boots, furniture, jackets, and belts.
Inspect The Internal Mechanism
To inspect the internal mechanism of your recliner, start by tipping the chair backward to access its underside. Remove any fabric covers or side panels to reveal the internal components. Use a flashlight to thoroughly illuminate all parts, paying attention to pivot points, hinges, and sliding tracks. Before making any adjustments, take note of the cables and springs, especially their positions and connections, and document their placements to ensure proper reassembly.
Trace the cable from the handle to the latch along its entire path, ensuring it remains aligned and free of obstructions. Confirm both ends of the cable are securely fastened to prevent slack or disconnection, and note that a recliner pull cable can be replaced yourself using a screwdriver and pliers. Manually press on the latch to test whether it releases the reclining bar smoothly. If you find any cables that are frayed or snapped, replace them immediately, as damaged cables often cause noise and malfunction. During this inspection, check the tightness of all seat frame bolts connecting the seat frame to the arm frame for stability. If any wooden frame components are broken, you can reinforce them with metal brackets and screws.
Check For Damaged Springs And Gears
To pinpoint the source of a persistent squeak, start by inspecting the internal mechanisms of your recliner. First, check for damaged springs. Look closely for broken zig-zag or serpentine springs, as stretched or snapped coils can create metal-on-metal friction that produces noise. Ensure all spring clips are securely attached; loose clips can cause metal ends to rub against the frame and generate squeaks. Rust on the springs can also cause grinding sounds, indicating the need for cleaning or replacement. For significant spring damage or if the chair fails to recline, it may be necessary to replace broken springs as advised for mechanical repairs. Next, examine the gears. Inspect the locking pawls and toothed plates for signs of wear, such as chipped or rounded teeth, which often cause clicking and slipping noises. Check the screws holding gear components—loose screws lead to rattling sounds. Also, examine the manual levers for any damaged gear teeth. If gears appear dry or unlubricated, friction increases, leading to high-pitched squeals. Remember that regularly oil moving parts can prevent noise and enhance function as part of ongoing maintenance. Addressing these specific issues will help you identify the precise cause of the squeak and guide you toward effective repairs, and regular inspection and cleaning of these internal parts is a key practice for maximizing your sofa’s lifespan. Choosing a sleek modern recliner with clean lines can sometimes feature simpler internal mechanisms that are easier to access and maintain.

FIX SAGGING FURNITURE WITH PROFESSIONAL RESULTS: Give your recliner chair, sofa, or couch a durable upgrade with this couch repair kit. Includes all components—springs, wire, spring clips, and screws—needed to restore couch cushion support and sofa support for sagging cushions. Perfect for DIYers who want to fix sagging seats and foundations, bringing new life to your furniture with long-lasting, heavy-duty materials.

FIX SAGGING FURNITURE WITH PROFESSIONAL RESULTS: Give your recliner chair, sofa, or couch a durable upgrade with this couch repair kit. Includes all components—springs, wire, spring clips, and screws—needed to restore couch cushion support and sofa support for sagging cushions. Perfect for DIYers who want to fix sagging seats and foundations, bringing new life to your furniture with long-lasting, heavy-duty materials.

Product size: Total length: 3-5/8 inches (measured from hook to hook as 3.46 inches), coil diameter: 13/20 inches, coil body length: 1-13/22 inches, wire diameter: 2mm, hook angle: 45 degree deflection
Test Your Repair And Plan Future Maintenance
After completing repairs, it’s essential to test their effectiveness immediately. Move the recliner through its full range of motion thirty times to evenly distribute lubricant and listen for any persistent squeaks. Tighten all bolts and verify that electrical switches show proper continuity with a multimeter, and also use the meter to test the power supply for correct voltage, as a green light does not guarantee sufficient power for operation. A professional DIY guide will often recommend you reset and recalibrate the control system after making adjustments. Conduct the noise test in a quiet room to accurately assess if the fix worked. For ongoing maintenance, schedule re-lubrication every six months and keep a detailed log of each service. Regular upholstery cleaning prevents dirt buildup that can accelerate wear, and maintaining good air filtration in your home reduces dust in the moving mechanisms. This proactive approach helps preserve your repair and prevents new noises from developing.