If your recliner isn’t feeling quite right, adjusting its tension might be the simple fix.
Whether it’s too stiff or too loose, a few small turns can improve your comfort.
Knowing how to adjust the mechanism helps you customize the chair to your liking and extend its lifespan.
You’ll find that the process is straightforward once you locate the right parts.
The full instructions below will guide you through every step to get your recliner working just how you want.
How Your Recliner’s Tension Actually Works
The tension springs are what provide the resistance your recliner needs to keep from flopping backward when you lean back. They are typically located beneath the seat and attached to a drive rod. The amount of tension in these springs directly influences the force required to recline the chair. When the chair is upright, the springs are stretched the least, and as you lean back, they stretch further, creating the necessary resistance. A common cause of recliner malfunction is fatigued springs which may require replacement or careful adjustment of the tension screws.
Adjusting the tension springs should be done cautiously. Over-tightening them results in jerky, abrupt movements when reclining, while under-tightening causes the backrest to struggle to stay in the reclined position. Over time, the springs can experience fatigue, weakening their ability to hold the backrest in place. For electric models, this movement is powered by small electric motors that consume very little energy. To maintain smooth operation, it’s essential to ensure the tension is uniform on both sides of the chair, enabling a seamless transition from sitting to reclining without shifting or sliding. Before making any adjustments, check the chair’s structural integrity for any other issues that might affect performance.
Gather the Right Tools Before You Begin
To adjust your recliner’s tension safely and effectively, gather these essential tools beforehand. Start with an adjustable wrench and a socket set for loosening or tightening bolts. Have hex keys on hand for adjusting tension thumbwheels. Use a screwdriver and needle-nose pliers to handle cable hooks and covers. Keep your grip secure with cut-resistant work gloves to prevent injuries.
A flashlight and inspection mirror will help you locate hidden components and identify areas needing adjustment. Knee pads are important to protect your knees and maintain proper posture while working on the floor. For stiff joints, silicone lubricant will make adjustments easier without damaging parts and will maintain the smooth functioning of moving parts. If you find any frame damage or loose joints, wood glue can help with repairs. Follow manufacturer guidelines for assembly and disassembly to ensure optimal results and avoid damaging your mechanism. Maintaining these moving parts is key to preserving the chair’s ability to improve mobility for the user.
Additionally, a non-slip mat prevents your work surface from shifting, and eye protection keeps debris out of your eyes. Being fully prepared with these tools not only speeds up the process but also ensures your safety throughout the task. Before starting, it is wise to use a multimeter to verify electrical continuity if your recliner has powered components.
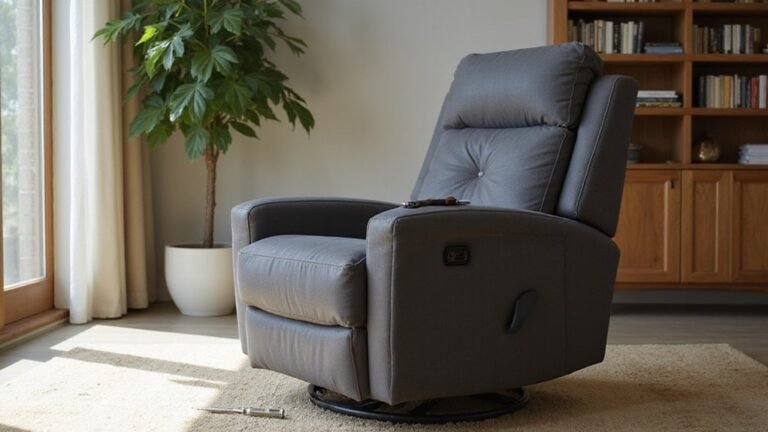
Safely Position Your Chair for Access
Pull the chair at least two feet away from the wall to ensure the mechanism functions properly. Maintain a clear, 30-inch wide walkway around the chair so you can move freely without bumping the footrest. If your chair is a power recliner, position it near an outlet and route the cord safely, keeping it away from the footrest’s path to prevent damage. This is particularly important for electric reclining mechanisms that require consistent power. Proper placement also makes cleaning easier, giving you full access around the base for fabric care. Check that nearby tables are positioned beyond the full extension of the legrest to avoid scratches or snags, helping protect your furniture during adjustments. This safe positioning is especially crucial when performing repairs, such as restoring the cable release system for smooth footrest operation, and helps minimize risks like muscle and joint stiffness from poor positioning during extended use.
Locate the Tension Adjustment Knob or Wing Nut
To locate the tension adjustment knob or wing nut, look under the seat of your chair near the center back area. You will typically find two wing nuts or thumb wheels on either side, threaded onto bolts connected to the tension springs. Use a flashlight if necessary to better see these components, especially in dim lighting. Some chairs may feature a side-mounted knob on the armrest instead; in that case, you’ll need to refer to the manual or visually inspect the chair to identify its location. These adjustment points are purely functional, not decorative. Wing nuts will have two flat wings for easy hand tightening or loosening, while thumb wheels are ridged cylinders designed for grip. This process requires careful handling similar to the locking levers and clips when detaching a recliner’s backrest. Adjusting these will change the tension to suit your comfort preferences. This functional focus is similar to the approach for a secure slipcover installation, which relies on straps rather than decoration. For more complex mechanical problems with your recliner, consult a comprehensive troubleshooting guide.
Inspect the Tension Mechanism for Damage
To inspect the tension mechanism for damage, start by locating the adjustment knob if it’s present. Conduct a thorough coil inspection of the spring. Look for breaks, fractures, or signs of fatigue in the coils, and check if the springs have lost their original elasticity—excessive stretching between coils indicates a potential problem. Examine for corrosion or rust, as this weakens the metal and may require replacing the spring. Verify that all washers or spacers between the coils are in place and not missing. A common technique during spring installation involves temporarily stretching springs with a screwdriver and using separators like nickels or washers between the coils to manage tension. For a simple repair, you can also try tightening existing springs to restore proper tension before considering a full replacement. If the mechanism remains unstable, consider adding a recliner anti-slip pad beneath the chair to minimize unwanted movement during inspection and repair. If you find a broken recliner pull cable instead of a spring issue, it can be replaced using a basic DIY approach.
Next, inspect all fasteners securing the mechanism. Check the four Torx screws and any mounting bolts for looseness, stripping, or signs of wear. Assess the wing nuts and thumb wheels for proper function. Finally, examine the bolt holes where the mechanism attaches to the frame for signs of metal fatigue or widening, which could compromise stability.
Increase the Tension (Turn Clockwise)
To increase the tension on your recliner, turn the adjustment mechanism clockwise. This typically involves rotating wing nuts, thumb wheels, or hex bolts located under the chair’s frame. Turning these components clockwise compresses the internal springs, which increases the force needed to recline and results in a smoother, more controlled movement. Adjustments should be made gradually—turn in small increments of a quarter or half a turn. Carefully test the recline resistance after each adjustment by sitting in the chair. This ensures you don’t over-tighten, which could make the recliner too stiff or difficult to operate. Be sure to turn both sides equally for balanced support and stability. Properly adjusted tension can also help prevent unwanted sliding, keeping your furniture securely in place. For a clean look, you can manage the power cord with a decorative cord cover that matches your décor. If your recliner still fails to lock into place, inspect for a worn locking pawl or damaged mechanism components. You can also apply lubricating oil to these moving parts to prevent noise and ensure smooth adjustment. Remember, consistent clockwise rotation increases the tension, giving you a firmer, more controlled reclining experience.
Decrease the Tension (Turn Counterclockwise)
To decrease the tension and make your recliner easier to lean back, turn the adjustment components counterclockwise. First, locate the adjustment bolt near the rear brackets. Use your Allen wrench to fit securely into the bolt head, then turn it counterclockwise in quarter-turn increments. This allows for precise tension calibration, preventing over-loosening. You can also adjust a wing nut or a marked knob by turning it left toward a “loosen” arrow. Make small, equal adjustments on both sides, then test the recliner’s motion after each change. This careful process ensures smooth reclining with less resistance and avoids excessive looseness. Always check for misaligned or loose hardware if adjusting the tension does not solve a leaning or rough operation problem. For those who need additional assistance, a power lift recliner offers an electric lifting mechanism to safely aid in standing up.
Secure the Tension Mechanism and All Loose Components
After reducing the tension, securely fasten all hardware. First, ensure every fastener you loosened or removed is tightly tightened. Locate the tension spring and its mechanism, then grasp the spring with needle-nose pliers to confirm both hooks are properly aligned and seated in their eyelets on the frame and drive rod. Always wear eye protection when handling springs to prevent injury from potential recoil. Reinstall any panels you removed and secure their bolts as you would during a meticulous drapery installation. Finally, check that the chair sits flat and stable on your floor padding, verifying that all reattached components, such as the footrest, are firmly secured and that no parts rattle loosely.
Test Your Recliner’s New Tension Setting
To verify your recliner’s tension adjustment, start by sitting in the neutral position without using your legs to recline. Observe whether the chair leans back smoothly when you lean, without feeling jerky or overly resistant. It should support your upright position comfortably without snapping aggressively when reclined. Perform several incremental recline and return cycles, stopping at intermediate angles to check for stability and ease of movement. Hold each position without supporting with your hands to test if the lock engages properly and keeps the chair steady. Take a deep diaphragmatic breath and watch if it causes a controlled micro-recline, indicating the tension is correctly set for your body weight. Move through various angles and ensure the chair remains firm and level at each position. Remember to use the correct method for visual comparison of resistance during your tests. Compare your experience with your personal comfort and safety preferences, confirming that motion is smooth, secure, and consistent across all recline positions.
What to Do if Adjustment Doesn’t Fix the Problem
If adjusting the tension doesn’t fix your recliner’s problem, the issue may be more complex. Start by checking for mechanical damage. Look for broken springs or a worn locking pawl that might prevent proper operation. Confirm that all screws are tight and secure, as loose fittings can affect movement. Inspect the lever or cable for any signs of damage or wear. If parts feel stiff or resistant, spray silicone lubricant on pivots and use graphite on track areas to improve movement. Dirt and debris inside the mechanism can also hinder function, so clean these areas thoroughly.
If these basic steps don’t resolve the issue, additional measures might be needed. For motorized chairs, verify the power cord’s connection and inspect wiring for damage. Persistent problems may require professional repair, especially for complex mechanisms or if replacement parts are necessary. Minor surface issues such as fabric stains or small upholstery tears can be addressed with cleaning or repair, but consider whether the cost of fixes is justified relative to the chair’s value.