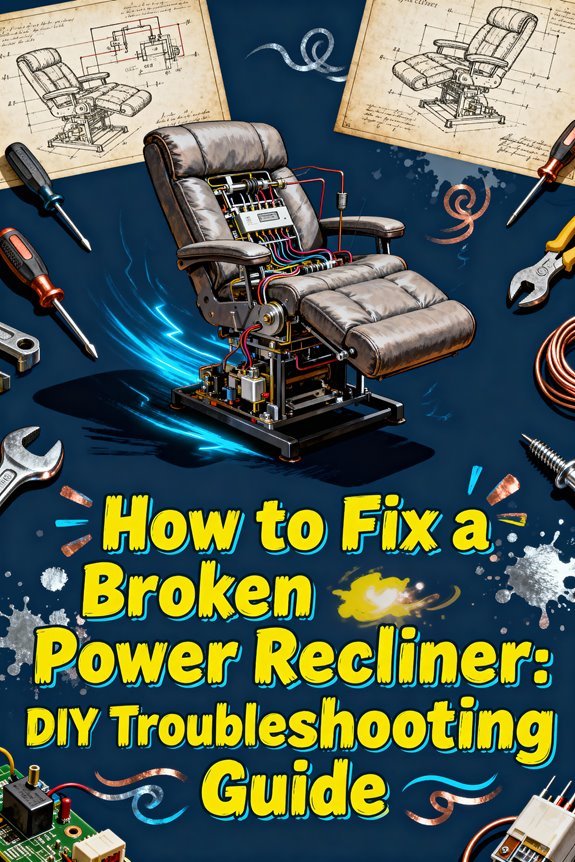
To fix your broken power recliner, start by checking the power supply, ensuring the cord is properly plugged in and testing the outlet. Next, inspect for loose wires, damaged cables, or mechanical obstructions that could affect operation. Run diagnostic checks on the remote control, motor function, and reset mechanisms. If basic troubleshooting doesn’t resolve the issue, you’ll need to examine internal components or consider professional repair. Our thorough guide breaks down each step in detail.
Common Power Recliner Problems and Their Causes
When your power recliner stops working properly, it’s essential to understand the most common issues that can affect its operation. Among the frequent recliner malfunctions, electrical problems often top the list, including unplugged power supplies, damaged cords, and blown fuses. Motor issues manifest through slow movement, clicking sounds, or complete failure to respond.
Key troubleshooting tips start with examining mechanical components, where you’ll find jammed footrests, broken gears, or misaligned tracks causing operational failures. Remote control units can malfunction due to battery issues, damaged buttons, or worn-out components. Additionally, wiring problems, such as loose connections, pinched cables, or pet-related damage, frequently lead to erratic recliner behavior. Limit switch problems can cause the recliner to stop at incorrect positions or fail to fully extend. Regular inspection of these components helps identify potential issues before they escalate into major malfunctions. Testing the mechanism’s voltage with a multimeter should show 29 volts DC for proper operation. Modern power recliners utilize electric actuators to convert rotary motion into the linear movement needed for smooth reclining action.
Essential Safety Precautions Before Starting Repairs
Before attempting any repairs on your power recliner, implementing proper safety measures is essential to prevent electrical shock, injury, or further damage to the mechanism. First, unplug the recliner from the wall outlet and remove any backup batteries to guarantee complete power disconnection. Use a circuit tester to verify no current remains. Check the power cord condition carefully for any signs of damage or exposed wiring. During power outages, most models lack a manual override feature, so repairs should be planned when power is available.
Carefully examine the reclining mechanism for any debris or rust buildup that could be causing issues. Organize your workspace by clearing the surrounding area and guaranteeing adequate lighting. Set up your safety equipment, including insulated tools and protective gloves, before beginning work. You’ll need proper screwdrivers, pliers, and wrenches as specified in your manufacturer’s manual. Position the recliner on a stable, flat surface and arrange all tools within easy reach. When handling components, be mindful of springs, motors, and other moving parts that could cause injury during disassembly.
Basic Power Supply and Electrical System Checks
The systematic diagnosis of power recliner issues begins with thorough electrical system checks. Start your power supply troubleshooting by verifying that your recliner’s power cord is firmly plugged into a functioning outlet – test the outlet with another device to confirm it’s live. Using a multimeter, check if the transformer is outputting the correct voltage (typically 29V DC).
Next, perform electrical connection checks throughout the chair’s wiring system. Regular inspection and maintenance of electrical components can prevent future malfunctions. Examine all visible wires and connectors for damage, looseness, or disconnection. Pay special attention to areas where wires may become pinched during chair movement. Test continuity across switch cables and motor wires to identify any breaks or shorts. Don’t forget to inspect the power cord itself for cuts or exposed wiring that could interrupt power flow.

【COMPATIBLE WITH】 : Power recliner power supply with electric recliner power cord for OKIN, Limoss, Pride, Golden, Lazboy, Berkline, Med-lift and Tranquil Ease Lift Chair, Cheers Electric Sofa, Power Recliner DeltaDrive and BetaDrive Motors with a two pin (flat & round) connection to the the motor accessories replacement parts

Quality Brands, Hassle-Free Service: Please feel free to contact us with any product issues firstly. Sopito has been selling recliner replacement parts since 2017, we strictly control product quality and offer a quality service for you

This recliner power supplu's parameter: Input: AC 100-240V,50/60Hz; Output: DC 29V 2.0A.
Remote Control and Button Diagnostics
Proper diagnosis of remote control and button malfunctions requires a systematic testing approach to isolate the source of failure. Start by checking for common remote malfunction symptoms: unresponsive controls, stuck buttons, or failed indicator lights. Then, disconnect the remote or button control from the actuator to test the components separately. A green indicator light will confirm proper power supply functionality.
Make sure your power recliner has continuous power by checking its connection to the wall outlet or battery pack status. Use a multimeter to verify electrical continuity while pressing each button. Inspect for button wear issues like damaged membranes or worn tactile switches. For best results, use basic tools like screwdrivers and pliers to check internal connections. Check all wiring for pinched cables, loose connections, or damaged insulation. For wireless remotes, test battery condition and proper orientation.
If initial tests don’t reveal the problem, try the reset procedure or sync the remote according to manufacturer instructions. When DIY troubleshooting fails, contact professional service technicians for complex repairs or control unit replacement.

This remote has a long black housing with two large black buttons that have usb and backlight

2 Button 5 Pin Connection to the Motor,work for 1 motor
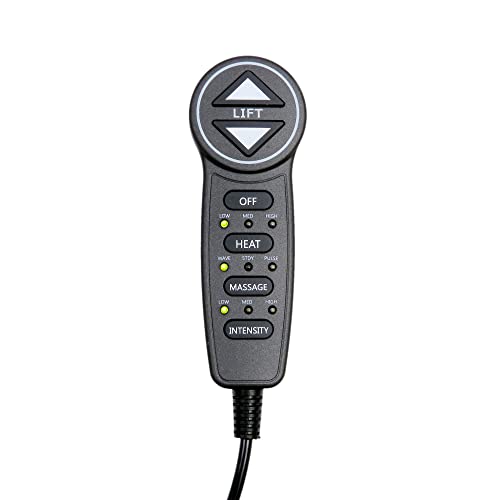
MLSK55-A1 Hand Control Handset Remote for Lift Chairs Power Recliners
Manual Reset and Recalibration Steps
Successfully resetting and recalibrating your power recliner requires a systematic three-phase approach: locating the reset button, performing the manual reset procedure, and completing motor recalibration.
To address common recliner malfunction causes, first locate the reset button near the control panel, under armrests, or by the motor housing. You’ll often find it between open/close buttons or concealed under fabric flaps. Once you’ve determined the reset button location, unplug your recliner and wait 30 seconds. Press the reset button with a thin tool until you feel activation, holding if required by your model. If your chair previously used manual controls, conversion kits can help restore functionality. Working in a well-lit area helps avoid mistakes and ensures you can properly identify small components during the reset process.
For easier access to internal components, consider removing the backrest by locating and releasing the locking levers on both sides of the chair.
After plugging the recliner back in, initiate recalibration by following your model’s specific instructions. The chair will cycle through positions to reset internal markers. Don’t sit in the chair during this process to guarantee accurate calibration.
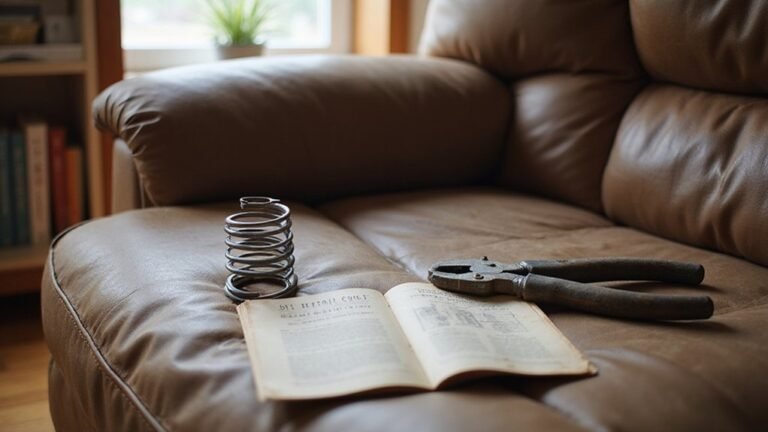
Inspecting and Repairing Mechanical Components
Maintaining ideal performance of your power recliner requires systematic inspection of its mechanical components. Begin your recliner frame inspection by examining seat frame bolts, springs, and metal components for wear, deformation, or rust. Check cable routing verification to ascertain proper tension and movement without kinks or obstructions. A thorough inspection of the lock levers on back brackets will help identify any malfunctioning parts that need replacement. Most recliners utilize a pull handle system for smooth operation of the footrest mechanism. Using basic hand tools like pliers and screwdrivers will help you complete most repairs effectively.
You’ll need to inspect plastic clips and cable ends that connect to the metal mechanism, replacing any broken components with manufacturer-approved parts. Don’t forget to examine footrest mounting screws and pivot points, verifying proper torque and alignment. Before starting any repairs, unplug your recliner and gather appropriate tools like socket wrenches and cable release tools. Pay special attention to connection points between the footrest and actuator mechanism, as these areas often experience the most wear.
Troubleshooting Motor and Drive System Issues
When your power recliner stops responding correctly, systematic troubleshooting of the motor and drive system can identify the root cause. Begin motor troubleshooting by verifying the power supply delivers approximately 29V DC using a multimeter. Check if the motor responds to direct power application, but keep tests brief to avoid damage. Using a surge protector unit when plugging in your recliner will help prevent electrical damage to sensitive motor components. Listen for clicking sounds that might indicate mechanical obstructions or relay problems. Motor port location under the seat cushion should be carefully inspected for secure connections. Electric motors enable smooth, effortless adjustments compared to manual recliners that require physical force.
For suspected actuator failure, inspect internal relays and limit switches that could prevent proper operation. Test the control buttons by swapping with a known working set to isolate the problem. Examine all wiring connections for continuity, paying special attention to areas where cables might stretch or pinch during recliner movement. Remember that excess weight or forcing movement against mechanical stops can cause motor strain and eventual failure.
Cable and Wiring Maintenance Guide
The cable and wiring system serves as the lifeline of your power recliner’s operation, connecting all electrical and mechanical components into a functional unit. To maintain peak performance, you’ll need to perform regular cable inspection tips, starting with identifying your cable type and checking for fraying or disconnection points. Cable repair kits are readily available through online suppliers for DIY repairs.
When conducting repairs, unplug your recliner first. Understanding that the cable system controls the reclining function is essential for proper maintenance and repair. Examine all wiring connections between the mechanism, power supply, and control unit. If you’re replacing cables, document the routing path and measure carefully before installation. For wiring replacement techniques, verify you’re using identical gauge wire and proper insulation methods. Before reassembly, inspect the touch junction switch for any signs of damage or malfunction.
Apply lubricant sparingly to metal cables and use contact cleaner on electrical connections. Keep all components free from dust and debris, and schedule regular inspections to catch potential issues before they become major problems.
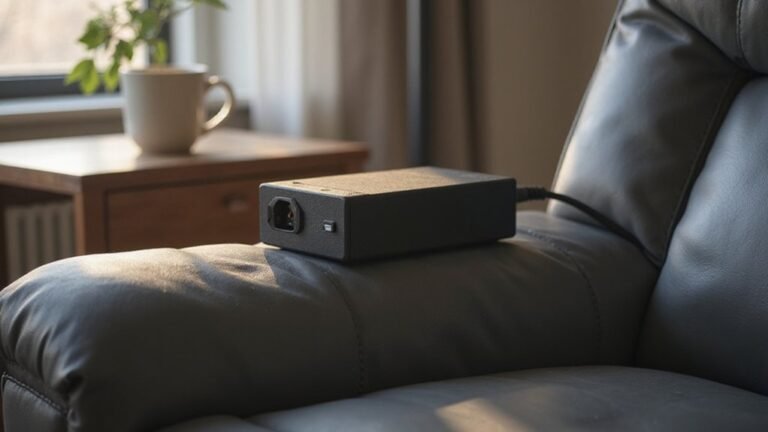
Power Supply Component Replacement
Replacing your power recliner’s power supply components requires precise matching of voltage, amperage, and connector specifications to guarantee safe, reliable operation. Before installation, confirm power supply compatibility by checking transformer specifications and connector types specific to your recliner model.
Start by disconnecting all power sources and accessing the power supply location. If you’re dealing with specialized connections like La-Z-Boy’s 5-pin system, you’ll need appropriate adapters or conversion cables. Many power recliners use a standard two-prong connection but some brands differ. When installing the new unit, carefully align connectors to prevent pin damage, and secure the power supply in its original position without straining cables.
Test the replacement by measuring voltage output with a multimeter under load conditions. Don’t forget to verify any battery backup systems and make certain all connections are properly seated before reassembling the recliner.

【Compatible with】:Switching power supply transformer fully compatible with Okin, Kaidi, Limoss, Pride, Golden, Lazboy, Flexsteel, Ashley, Room to Go, Berkline, Med-lift and Tranquil Ease Lift Chair, Cheers electric sofa, Power Recliner Motors with 2 Pin Flat Round Connection

【Compatibility】: TTmagic Power recliner power supply compatible with most recliner sofas, lift chairs, electric sofas, and adjustable beds from popular brands including OKIN, Limoss, Lazboy, Pride, Catnapper, Ashley, Tranquil Ease, Cheers, BetaDrive, DeltaDrive, and more. The 2-pin motor connection (one flat, one round) matches a wide range of models. If the connector matches your device, it will work.

【COMPATIBILITY】: Recliner Power Supply can be used for 2 Pin connector Power Recliner, Lift Chair, Electric Couch, Electric Sofa, Standing Desk, Lazy Boy Recliner Chair, Reclining Furniture, Adjustable Bed, compatible with most brands like lazy boy, Okin, Ashley etc.
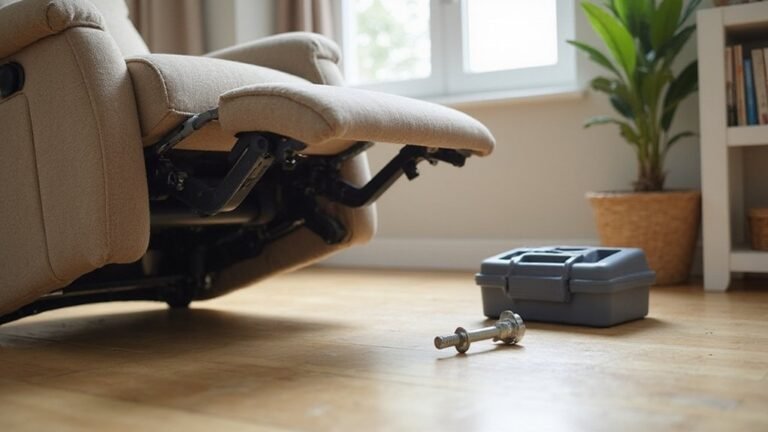
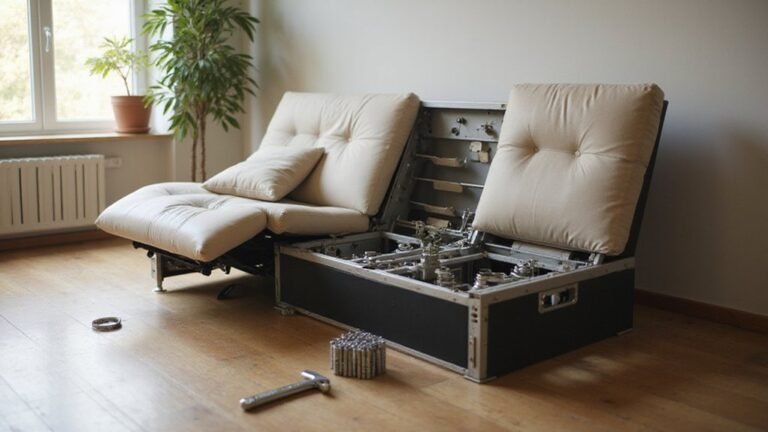
Mechanical Parts Repair and Replacement
Successful mechanical repairs on power recliners start with a thorough inspection of key components like cables, springs, and lever assemblies. When performing recliner cable repair, you’ll need to locate the plastic clips securing cables to the mechanism and carefully release them using a tack puller. Remove the four torque screws on the footrest to access the cable system. After disconnection, you may need to utilize needlenose pliers to extract damaged cables.
For spring assembly adjustments, gently release the tension by pushing springs around lever hooks. Pay attention to proper spring placement in the mechanism frame’s dedicated holes. Don’t forget to check plastic bushings between bolts and levers for wear. Consider adding metal brackets to reinforce any weakened frame sections. Check for any bent components that may prevent smooth operation. You’ll find replacement parts like cables, springs, and bushings through furniture parts suppliers or online marketplaces. When reinstalling components, verify all plastic clips fully engage to prevent future malfunctions.

【Power Specification】: Input: AC 100-240V, 1.5-2.0A, 50/60 Hz. Output :DC 29V/24V 2.0A. Power Adapter Almost compatible with most brand recliners: Switching power supply transformer fully compatible with OKIN, Limoss and Tranquil Ease Lift Chair and Power Recline DeltaDrive and BetaDrive Motors with a two pin (flat & round) connection to the motor.
![[UL Listed] Power Cord Compatible with Electric Recliner or Liftchair 6Ft Power Cable Replacement](https://m.media-amazon.com/images/I/31OHFyo5tkL._SL500_.jpg)
Non Polarized 2 Prong Figure 8 Power Cord ( IEC320 C7 to NEMA 1-15P ), 18 AWG, 125V 7A

【COMPATIBLE WITH】 : Thanks to a two-pin connector (one flat and one round), your new power supply works with a wide range of chairs, sofas, and recliners, and is suitable for use with the most popular brands, makes and models of powered furniture.Perfect Replacement Cord for Power Furniture with dual motors; Whether your power furniture cord is lost, missing, damaged, or even chewed up by your favorite pet, this power supply pack for dual reclining sofas, loveseats and sectionals is the ideal replacement, and low-cost solution to keep on reclining in style
Preventive Maintenance Tips for Power Recliners
While mechanical repairs address existing issues, implementing regular preventive maintenance extends your power recliner’s lifespan and minimizes future repairs. Start by establishing a consistent upholstery care routine: vacuum regularly with an attachment tool and promptly clean spills using appropriate cleaners for your material type.
Maintain mechanical components by implementing a lubrication routine using silicone-based products on tracks and joints, avoiding oil-based options that attract dust. Test your recliner’s full range of motion monthly, listening for unusual sounds. Keep electrical components safe by using surge protectors and inspecting cords regularly for damage. For optimal back support and comfort, adjust your recliner to maintain proper lumbar alignment while seated.
Protect upholstery from sun exposure, pet damage, and excessive wear. Don’t forget to check under the recliner for debris that could interfere with mechanisms, and clean control panels with a slightly damp cloth while unplugged. Scheduling routine inspections of mechanical parts helps identify potential problems before they become serious issues.
When to Call a Professional Repair Service
Although many power recliner issues can be resolved through DIY maintenance, certain problems demand professional intervention for safety and effectiveness. You’ll need to consult professional services when your recliner exhibits complete motor failure, unusual mechanical noises, or complex electrical faults that persist after basic troubleshooting. During power outages, attempting to bypass motor mechanisms without proper expertise could damage your recliner permanently.
Call an expert when you notice structural damage like cracked frames, broken joints, or compromised stability. Professional intervention is also necessary if your recliner’s mechanism becomes severely jammed or hardened beyond simple adjustments. For repairs involving sealed motor housings, electronic control boards, or specialized parts, technicians have the proper diagnostic equipment and manufacturer-specific components. While minor fixes are feasible DIY projects, complex repairs typically cost between $100 to $400 and require professional expertise to guarantee safe, lasting results. Quality repairs and maintenance can help extend your recliner’s life to 15 years or longer with proper care.
Essential Tools and Replacement Parts Guide
Fixing a power recliner requires a specific set of tools and replacement parts to complete repairs effectively and safely. Your tool selection should include both manual and power tools: vital screwdrivers (Phillips and flathead), pliers, hex keys, and a cordless drill for efficient disassembly. You’ll also need diagnostic tools like voltage testers and outlet testers to troubleshoot electrical issues.
When sourcing replacement parts, verify part compatibility by matching your recliner’s make and model precisely. Key components you might need include power transformers, motors, remote controls, and mechanical parts like cables and springs. Consider both OEM and aftermarket options, but document part numbers before ordering. Don’t forget safety equipment – work gloves and eye protection are essential during repairs. Keep maintenance supplies like lubricants and cleaning materials on hand for post-repair care.

✅►【Applicable Brands】-- Compatible with many recliner chair motors and lift chair systems from Okin, Limoss, Action, Berkline, Comfort Chair, Golden, La-Z-Boy, Med-Lift, Mega Motion, Pride and other brands using the same 2-button, 5-pin round plug design. Please verify your original plug and function before purchase

Includes 2 piece fixture bracket furniture restoration sofa connector tilt mechanism connection bracket.

【COMPATIBLE WITH】 : Power recliner power supply with electric recliner power cord for OKIN, Limoss, Pride, Golden, Lazboy, Berkline, Med-lift and Tranquil Ease Lift Chair, Cheers electric sofa, Power Recliner DeltaDrive and BetaDrive Motors with a two pin (flat & round) connection to the the motor.