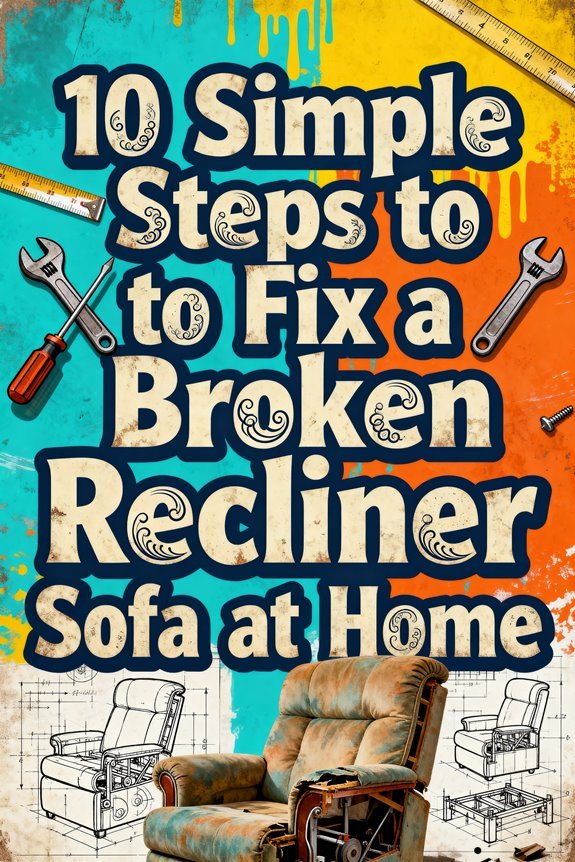
You can fix your broken recliner sofa by following 10 key steps: diagnose the specific issue, check power supply if electric, inspect springs and cables, examine the release mechanism, test the handle assembly, lubricate moving parts, tighten loose components, clean debris from tracks, replace worn parts, and verify smooth operation. While basic repairs are achievable with common tools, understanding your recliner’s mechanics will help determine if you need professional service.
Diagnosing Common Recliner Problems
Five major issues commonly plague recliner sofas, making it essential to identify the root cause before attempting repairs. When diagnosing problems, you’ll need to check for mechanical failures in the release mechanism, stuck footrests, reclining malfunctions, noise issues, and footrest alignment concerns. Start by testing the recliner’s basic functions – if you notice mechanism stiffness, inspect for broken cables, detached springs, or surface rust on moving parts. Listen for squeaking or creaking, which often indicates loose hardware or lack of lubrication. Check if the footrest extends evenly and the recliner stays locked in position. Common indicators of serious problems include bent frames, sheared handles, or debris blocking the mechanism. Your diagnosis will determine whether you need simple maintenance or complex repairs. Begin by examining the power supply connections, as loose or unplugged wiring is a frequent cause of recliner malfunctions. For electric models, test the control button system by checking for loose wires or unresponsive switches before attempting more complex repairs. If the mechanism appears jammed, carefully inspect for misaligned components that may need resetting or reinstallation.
Testing Power Supply and Electrical Components
After identifying mechanical issues, electrical problems in power recliners require systematic testing of components. Start with voltage measurement using a multimeter set to DC mode to test the power supply‘s output, which should read around 29 volts when functioning correctly. Inspect the power cord for damage and verify outlet functionality by testing with another device. A power recliner needs 28-29 volts for optimal performance. Modern power recliners rely on an electric actuator system to smoothly control positioning and movement.
Next, test the motor by connecting it directly to a known power source. If it runs independently, check the wiring harness and control system for loose connections or damage. Don’t forget to examine control switches and remote interfaces for proper operation, replacing batteries if needed. Monitor power supply indicator lights – a solid red LED typically signals normal operation. If you notice flashing lights or no illumination, troubleshoot by sequentially unplugging and reconnecting components. Check for any stuck limit switches that may prevent the recliner from moving through its full range of motion.
Checking Springs and Tension Mechanisms
Properly functioning springs and tension mechanisms are essential for a recliner’s smooth operation and support. Start your tension inspection by examining the area beneath your chair for any detached springs or signs of damage. Look for rust, deformation, or breaks that might affect performance. When checking the recliner’s functionality, ensure the cable system control is responding correctly.
To perform spring adjustment, locate the tension adjusters—typically wing nuts, thumb wheels, or hex bolts—under the seat or near reclining components. Turn clockwise to increase tension or counterclockwise to decrease it. Make quarter-turn adjustments on both sides equally, testing after each change. If you find broken springs or severely worn components, you’ll need to replace them with matching parts. For safety during repairs, always wear eye protection when working with springs under tension. Some recliners feature mounting holes that allow you to reposition springs for optimal tension adjustment.
Remember to regularly clean and lubricate the mechanisms, and address any minor issues promptly to prevent more serious problems from developing.
Inspecting and Repairing Lever Systems
When your recliner’s lever system malfunctions, you’ll need to conduct a thorough inspection of its core components: the handle, cable, plastic clips, and metal parts. Start by tilting the recliner forward and removing the handle’s access screws. Check for broken cables, damaged clips, or corroded metal components that might impair the mechanism’s function. Always use a protective sheet to prevent damaging the leather surface during repairs. Replacement handle kits are readily available from online suppliers if needed.
For proper lever installation, disconnect the cable by carefully pinching the plastic clips. Measure the old cable’s length from S-hook to lever before replacing it. When installing the new cable, secure it with fresh plastic clips and attach the S-hook to the mechanism slot. Regular cable maintenance, including cleaning and lubricating moving parts, will extend your recliner’s lifespan. Use pliers for clip management and avoid forcing stuck components to prevent further damage. A Phillips screwdriver is essential for accessing and reattaching the mechanism’s hardware.
Fixing Loose or Broken Handle Assemblies
Loose or broken handle assemblies represent one of the most common recliner issues you’ll encounter. To fix this, you’ll need a screwdriver, pliers, and possibly a torque wrench. Start by removing the mounting screws carefully, then detach the handle from the side panel. When installing the replacement handle, verify you connect the cable end securely in the lever groove and attach all necessary plastic clips. Previous makeshift repairs using zip tie solutions often prove ineffective.
For effective handle maintenance tips, regularly check and tighten mounting screws, and avoid using excessive force when operating the mechanism. When exploring handle replacement options, you can source parts from specialty suppliers or online retailers. Remember to keep your original screws, as new handles don’t always include them. If the frame supporting the handle is damaged, consider using wood reinforcement blocks to strengthen the area. Apply light lubrication to moving parts and replace frayed cables promptly to prevent further damage. Just like footrests, regular track cleaning helps prevent mechanism failure and extends the life of your recliner handle assembly.
Repairing the Locking Mechanism
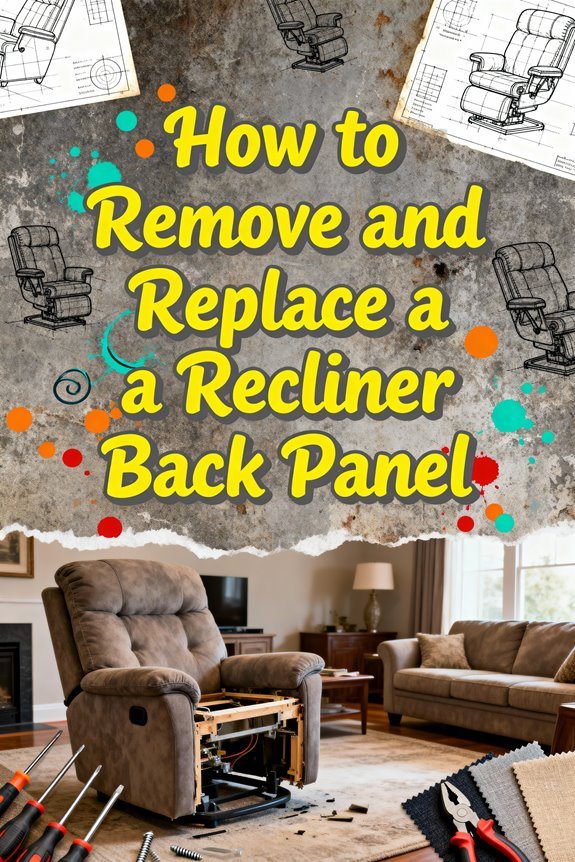
A malfunctioning locking mechanism can prevent your recliner from staying in position, requiring immediate attention to restore proper functionality. To address locking mechanism issues, start by removing the back panel upholstery and unbolting the mechanism from the frame rails. You’ll need to document bolt locations for accurate reassembly. Remember to wear safety gloves throughout the repair process for protection against sharp metal edges.
Inspect the mechanism’s components for wear, bent parts, or misalignment. For complex repairs, consider getting professional help to avoid damaging the mechanism further. Apply appropriate cleaning techniques using solvents to remove dirt and rust, then lubricate pivot points with light machine oil. Use needle-nose pliers to realign any bent teeth, and adjust spring tension to guarantee proper engagement. Adding metal brackets can provide extra reinforcement to weakened areas of the frame.
After repairs, reinstall the mechanism following your documented bolt pattern. Test the recliner through multiple cycles to verify consistent locking. If the mechanism still fails to lock reliably, you’ll need to replace it entirely.
Replacing Damaged Springs and Cables
Similar to addressing locking mechanism issues, damaged springs and cables require careful attention to restore your recliner’s comfort and functionality. Start by identifying sagging areas and flipping your sofa to inspect the underside. You’ll need pliers, wire cutters, and protective eyewear for safe repairs. Using a heavy-duty thread to secure reattached springs provides extra durability and stability. Before beginning repairs, check for any loose hardware that could be causing instability issues.
When removing broken springs, work with them in their least stretched position to minimize tension. For spring installation, use vice grips to carefully stretch and secure them to attachment points with appropriate clips. During cable routing, follow the original configuration precisely, confirming proper tension throughout the mechanism. Most recliners use a cable release system that connects directly to the pull handle.
Once you’ve secured all components, reattach the upholstery and test the recliner’s operation slowly. Make any necessary adjustments to clips or attachments to confirm smooth movement and stable support before completing the repair.
Troubleshooting Electric Motors
When your electric recliner starts malfunctioning, it’s crucial to systematically diagnose the motor’s condition before attempting repairs. Begin your motor troubleshooting by checking the power supply voltage and ensuring all electrical connections are secure. Listen for unusual noises that might indicate bearing damage or stator issues. It’s important to remove back panel to access key motor components. Consider using elastic straps to secure any loose wiring after repairs.
Perform basic electrical checks by measuring the motor’s winding resistance and testing the capacitor if the motor won’t start. You’ll need to inspect the motor shaft for smooth rotation and verify the current draw matches the nameplate rating. If the motor stops running while in use, inspect for signs of voltage dropping below 90% of the rated value. If you hear excessive vibration, check the motor alignment and bearing condition. For overheating issues, examine the ventilation system and clean any debris blocking airflow. If these steps don’t resolve the problem, you may need to replace the motor entirely.
Maintaining Smooth Reclining Operation
Maintaining your recliner’s smooth operation requires a systematic approach to cleaning and preventive maintenance. Vacuum weekly with an upholstery attachment to remove debris from fabric surfaces and seams, and tilt the chair back monthly to clean underneath. As part of your preventive maintenance routine, apply silicone-based lubricant to mechanical tracks and joints when you notice resistance or squeaking. Pay special attention to pivot point locations where most squeaking sounds originate. Deep cleaning treatments should be performed every 12-18 months to maintain optimal fabric condition.
For maximum fabric protection, use washable armrest covers and appropriate cleaning solutions based on fabric care codes. Keep the area around and under your recliner clean to prevent dust and dirt from infiltrating the mechanisms. Regular inspections of pivot points, hinges, and moving parts will help you identify wear early. Remember to tighten loose components and verify that no foreign objects interfere with the reclining mechanism’s operation. If you have a power recliner, check for loose electrical wires during your monthly maintenance to ensure safe and reliable operation.
Essential Tools and Replacement Parts
Successfully repairing a recliner sofa requires having the right tools and replacement parts readily available. Start with proper tool organization by gathering essential hand tools like screwdrivers, pliers, and measuring tools. You’ll need specialized upholstery tools including staple removers, hog-ring pliers, and sharp shears for fabric work. It’s important to have a cordless drill with LED for working in dark, hard-to-reach areas of the recliner mechanism.
For replacement sourcing, focus on critical components like springs, bolts, and mechanism kits that match your recliner’s specifications. Keep adhesives and repair materials on hand, including wood glue, fabric adhesive, and appropriate staples. Don’t forget power tools like drills for more complex repairs. When working with upholstery, you’ll need marking tools and various needles for precise work. Before starting any repairs, perform a thorough structural integrity check to ensure the chair’s frame is sound. Having these items organized and ready will guarantee you can tackle most recliner repairs efficiently. The locking pawl mechanism often requires special attention during repairs to ensure proper reclining function.