Noticing your recliner feels less supportive or makes strange snapping sounds? Those are signs your spring might be broken. Fixing it involves identifying the problem, removing the damaged spring, and installing a new one—often a straightforward DIY task.
With the right tools and some patience, you can restore your chair’s comfort without calling in a pro. Keep reading to see exactly how to get it done.
Confirm Your Recliner Spring Is Broken
To confirm if your recliner’s spring is broken, look for clear signs. First, sit on the chair and feel for seat sagging; a lack of firmness and instability suggest a spring issue. Listen carefully for a loud snap or pop when operating the recliner for the first time, which can indicate a spring has snapped. Visually inspect the area beneath the seat: a spring that is stretched, bent, or detached points to a break. Check for gaps at attachment points, which also signal a broken spring. When inspecting, reference manufacturer sketches if available to help identify the correct attachment points and understand the spring’s intended configuration. Press down on the seat—if it offers little resistance and feels soft or unsteady, the tension in the spring has likely been lost. This loss can cause the footrest to stay in the wrong position or prevent it from locking properly. Additionally, frame misalignment or unevenness in the chair’s position often results from a broken spring, affecting the overall operation and comfort. As with any mechanical repair, ensure a careful diagnosis of all components to avoid misidentifying the problem. For simpler fixes, a control system reset may resolve related electrical issues before you proceed with mechanical repairs. Paying attention to the recliner’s scale and proportion is important during repairs, as ensuring proper spring tension helps maintain the chair’s intended balance and support.
Access and Remove the Damaged Recliner Spring
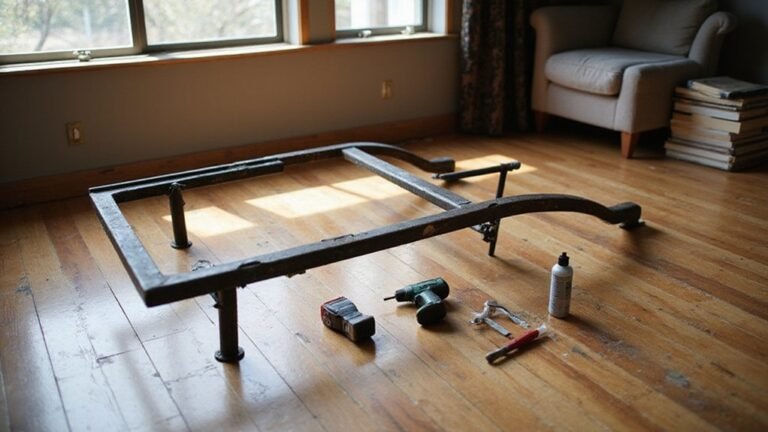
To access and remove the damaged spring, start by turning the recliner upside down and fully extending the footrest. Unplug any electrical components to ensure safety, a crucial precaution shared when working with power recliner mechanisms, and for battery-powered recliner models, ensure any rechargeable battery pack is disconnected. Locate the four retaining bolts that secure the spring assembly to the frame. With a helper stabilizing the chair, use your wrench to loosen these bolts, but do not remove them completely; keep the threading intact to prevent the assembly from shifting or falling. Carefully lift the entire spring assembly out, being mindful of the spring tension, which can be hazardous if handled improperly. Next, detach the footrest linkage from the old spring by removing its bolts. Clear any obstructions, such as clips or hog rings, to free the damaged spring completely before disposing of or replacing it. During this process, it is recommended to inspect all parts for damage and ensure all fasteners are secure. Be sure to organize removed hardware as you proceed to simplify reassembly later.
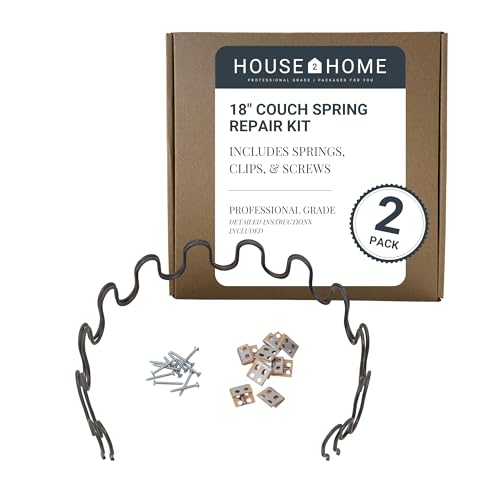
REPAIR SET - Whether you are working on a new upholstery project or just looking to fix a seat on an antique sofa or chair, this sinuous spring repair set includes the basic parts you'll need. It includes 2 no sag springs, 8 spring mounting clips (s-clips), 16 screws, and step-by-step instructions for installation

Non-sag springs with high resilience chrome for added durability, designed for furniture upholstery, sofas, chairs, recliners, dining chairs, and even automotive seats

FIX SAGGING FURNITURE WITH PROFESSIONAL RESULTS: Give your recliner chair, sofa, or couch a durable upgrade with this couch repair kit. Includes all components—springs, wire, spring clips, and screws—needed to restore couch cushion support and sofa support for sagging cushions. Perfect for DIYers who want to fix sagging seats and foundations, bringing new life to your furniture with long-lasting, heavy-duty materials.
Find the Correct Replacement Recliner Spring
To find the correct replacement recliner spring, you must match the exact specifications of the damaged spring. Start by measuring the spring carefully using a ruler or tape measure. Stretch the spring to measure the hook-to-hook length, noting the total length when extended but not overstretched. Use a caliper to determine the wire gauge, which affects the tension and strength of the spring. Count the total number of coils to match the coil count precisely. Measure the coil diameter from outside edge to outside edge, as this influences how the spring fits into the frame. Record all measurements—length, gauge, coil count, and diameter—to enable accurate matching.
Next, identify the spring’s type and mounting options. Check the hook style—L-shaped, S-shaped, or straight—as these impact how the spring attaches to the recliner frame. Examine whether the spring uses hog rings, clips, or other fasteners for mounting. Knowing the hook configuration and mounting method ensures compatibility with your recliner model. When selecting a replacement, verify that all specifications—length, wire gauge, coil count, coil diameter, hook style, and mounting type—match exactly from a reputable supplier. Cross-reference your measurements and part details with your recliner’s model number to confirm the part’s suitability. This careful matching prevents improper fit, ensuring the spring functions correctly and maintains the recliner’s comfort and durability. Remember to inspect the recliner motor port for any debris that could interfere with nearby components, even when repairing a mechanical spring. During your inspection, you should also examine the tension wire for damage, as a worn edge wire can affect the spring’s performance even after replacement. For a recliner that leans to one side, you may need to realign the tracks after installing the new spring. If your recliner is particularly heavy, consider using proper lifting techniques to safely reposition it during the repair process.
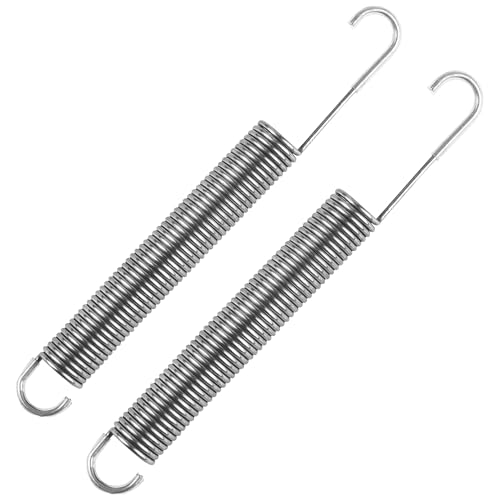
PRODUCT FUNCTION: The primary function of the recliner springs replacement can better support and cushion the weight and pressure of the body, providing users with a better experience and ensuring their safety ensuring optimal comfort for the user during use,and it can also be widely used in other items such as cars, bicycles, toys, lamps, furniture, car hood, crafts, molds, hardware and electrical appliances, etc
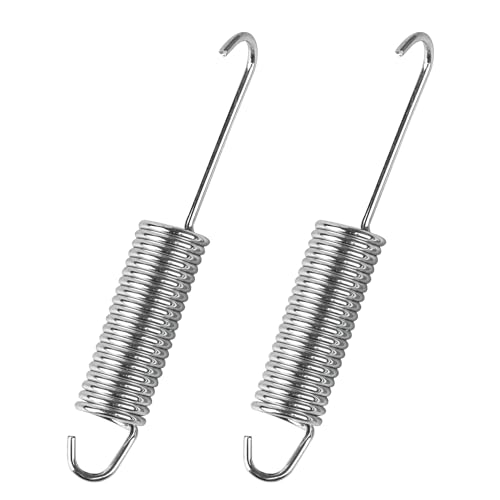
【Precision 4.5-Inch Design】: Total length of couch springs is 4.5 inches (114mm) with 3/4-inch coil diameter, 2mm wire gauge, and 20-turn high-density winding. Long neck hook fits major recliner mechanisms. Reinforced hooks prevent bending or slipping during use
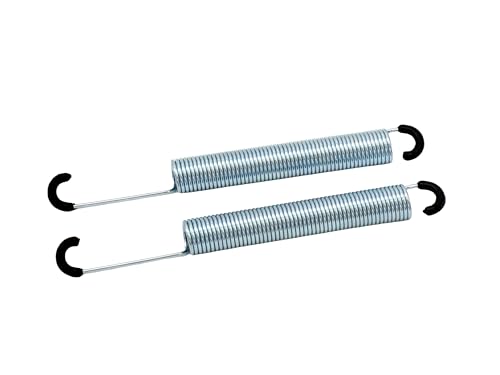
Mechanism assist / lock / tension spring.
Gather Your Recliner Spring Repair Tools
To prepare for a recliner spring repair, you need to gather the right tools. Essential hand tools include pliers and cutting instruments, which are necessary for detaching the old spring safely. You also require tensioning and stretching devices to manage the significant spring tension during installation of the new spring. Never overlook safety gear such as gloves and eye protection to prevent injuries from sudden spring releases. Fastening tools like a staple gun will be needed to re-secure the fabric once the repair is complete. Before starting, perform basic maintenance on your tools by ensuring pliers grip firmly and cutting edges are sharp. Organize all tools beforehand to prevent accidents and frustration, enabling you to focus on handling the spring’s stored energy safely and efficiently during your repair. Before you re-secure the fabric, it is wise to check the chair’s structural integrity for any other issues that may need addressing. Ensure there are no obstacles around the chair to provide a safe, clear workspace while you handle the spring tension. A displaced spring is a common issue that can affect both the footrest and back recline.

Excellent Material: This spring puller is made of high quality metal and rubber material, sturdy and durable, resistant to bending and corrosion, not easy to fade and break. The rubber coating on the handle provides a comfortable grip and reduces hand pressure, safe and odorless for long term use

Replacement Rocker Recliner Springs

🔧 [What You Get]🔧---------- You will get 63Pcs Couch Spring Repair Assortments Kit. Including 4pcs 27" no sag springs, 8pcs s-clips, 8pcs spring extension hooks, 10pcs 4" dual hook tension spring, 30pcs 1" nails and 1pc 5 x 10 ft black dust cover. Equiped with 2pcs removers for easily removing nails,in total 63Pcs sofa replacement accessories for your needs.
Install the New Recliner Spring Safely
To install a new recliner spring safely, start by wearing your safety gear, including eye protection and heavy-duty gloves. Attach one end of the spring to the designated frame point securely. To manage the spring tension without accidents, use vice grips or needle-nose pliers to carefully stretch the spring while attaching its second end. Be sure to do this slowly to avoid sudden movements from released tension. Replacement parts like springs or cables are readily available and economical to purchase from recliner part suppliers. Once both ends are connected, insert the retaining bolts and tighten them by hand before finishing with a wrench for secure fastening. For complex replacements, professional help might be advisable, especially if you discover bent metal parts while working. This is similar to the step-by-step method for handling other recliner mechanism components. Throughout the process, maintain full control over the spring tension, releasing it very gradually when disengaging or adjusting. Finally, check the alignment of the spring, comparing its position to your reference photo or the old spring to ensure correct installation.

FIX SAGGING FURNITURE WITH PROFESSIONAL RESULTS: Give your recliner chair, sofa, or couch a durable upgrade with this couch repair kit. Includes all components—springs, wire, spring clips, and screws—needed to restore couch cushion support and sofa support for sagging cushions. Perfect for DIYers who want to fix sagging seats and foundations, bringing new life to your furniture with long-lasting, heavy-duty materials.

Sofa Spring Repair Kit: our couch repair kit includes 8 springs, 16 upholstery spring clips, 40 ft seat spring stay wire, 20 stay wire clips and 64 screws, everything you need for a step-by-step installation guide. The straightforward installation process saves time and effort, restoring your furniture's support and comfort in no time

【25" Good Resilience Springs】: Featuring a high-strength 0.17" diameter (6-gauge), these sofa spring replacements utilize an S-shaped design to ensure even load distribution. They offer resistance to deformation and provide superior support
Test Your Recliner Spring Repair
Then, inspect for mechanical issues by ensuring all clamps, screws, and fasteners are tight and securely in place. Examine the frame surrounding the spring to confirm it is stable and properly aligned. As you test the chair, avoid prolonged sitting to prevent stiffness and maintain back health. Finally, verify that the upholstery is still properly aligned and no fabric has been caught or misaligned during the repair, as this could impact both safety and comfort. Consider the type of recliner, such as a power recliner, as its electrical components may require a different safety check after a mechanical repair.
Inspect and Maintain Your Recliner Springs
To maintain your recliner’s springs, start by removing debris and dust from the mechanisms using a soft brush or compressed air. This prevents dirt buildup that can cause noise or hinder movement. Next, apply a silicone-based lubricant to the moving joints and spring connectors. This helps reduce friction, preventing stiffness and squeaking during use. Plan to perform this maintenance every 6 to 12 months, especially if your recliner gets frequent use. For a more thorough check, it’s wise to occasionally inspect power mechanisms for any loose connections or wear. When using the recliner during pregnancy, ensuring it is in a proper semi-reclined angle with adequate support can enhance comfort and safety. Regular upkeep preserves the efficiency of your recliner’s components and can extend its overall lifespan, and you can further enhance the room’s aesthetics by using decorative cord management to handle any visible power cables.

DuPont Silicone Lubricant with Teflon Fluoro Polymer
SILICONE-BASED: This 4-blend pure silicone formula is ultra slippery with no sticky residue and designed to last. A little goes a long way with no need to stop the fun and reapply.

ENHANCE PERFORMANCE - B'laster Silicone Lubricant contains a higher concentration of silicone than competitor brands, which provides longer-lasting lubrication.