If your recliner isn’t holding its position or feels too loose, fixing it can often be a straightforward process.
You might just need to tighten a few parts or check for worn springs to restore that firm, comfortable recline.
With some simple steps, you can get your chair back to feeling just right.
The detailed instructions below will help you tackle the problem effectively.
Diagnose Why Your Recliner Is Too Loose
To diagnose why your recliner feels too loose, start by examining the springs and locking pawl. First, check for loose spring wear. Over time, springs can lose their elasticity, and a broken spring will offer no resistance. Look for gaps between coils or springs that are detached from their hooks, which indicates damage. This kind of spring failure results in the cushion sagging and the recliner feeling unstable. You can often restore firmness by replacing or reinforcing broken zig-zag springs. Before you begin any repair, it’s wise to check the chair’s structural integrity to ensure a solid foundation for your work. Next, inspect the locking pawl—a small lever that engages with the gear to hold the recliner in position. If the pawl’s teeth are worn down or its mounting screws are loose, it won’t engage properly with the gear plate, causing a wobbly or unstable recline. Additionally, observe for fabric distortion around the mechanism area, as this can hint at internal issues affecting tension. Regularly oil moving parts can prevent wear and maintain proper engagement of these components. If you find significant wear or damage, you may need to perform a full mechanism reset to restore proper function and tension. Remember, tension adjustments and lubrication are separate concerns; focus here on identifying problems with springs and the pawl to restore stability.
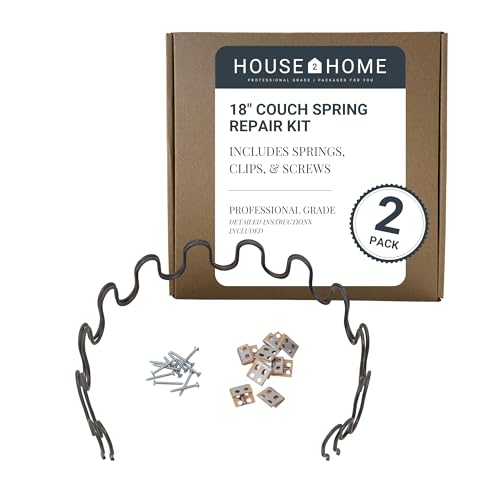
REPAIR SET - Whether you are working on a new upholstery project or just looking to fix a seat on an antique sofa or chair, this sinuous spring repair set includes the basic parts you'll need. It includes 2 no sag springs, 8 spring mounting clips (s-clips), 16 screws, and step-by-step instructions for installation

FIX SAGGING FURNITURE WITH PROFESSIONAL RESULTS: Give your recliner chair, sofa, or couch a durable upgrade with this couch repair kit. Includes all components—springs, wire, spring clips, and screws—needed to restore couch cushion support and sofa support for sagging cushions. Perfect for DIYers who want to fix sagging seats and foundations, bringing new life to your furniture with long-lasting, heavy-duty materials.
Find the Tension Knob or Wing Nuts
The tension knob or wing nuts are typically located underneath the chair seat. You’ll most likely find a pair of large wing nuts, one on each side near the back or center, secured on bolt ends. Adjusting both evenly is key to achieving proper tension. Flip the recliner over to access these parts safely and stably. Some chairs may use thumb wheels instead, which are usually beneath the recliner base and marked with plus signs or tighten arrows. Less common options include a tension knob on a side lever. Regardless of the type, these adjustment points are connected to springs, which are compressed or released by turning the hardware. For a stubborn mechanism, applying a bit of lubricating oil can ease adjustment. This is similar to the careful handling needed when repairing a recliner pull handle. Consistent maintenance of these mechanical parts can significantly extend your recliner’s lifespan, which can be quite substantial for a well-made chair. Note that the nuts or knobs often tilt forward to allow access for adjustment.
Adjust the Tension Correctly
To adjust the tension correctly, locate the tension knob or wing nuts on your recliner. Turn them clockwise to increase tension, which makes the chair’s recline firmer. Turn counterclockwise to decrease tension for a softer, easier recline. Make small, quarter-turn adjustments on both sides at the same time to keep the balance even. After each adjustment, flip the chair back and test the resistance to ensure it feels right. While these adjustments won’t improve the look of your chair directly, a properly tensioned seat prevents unnecessary strain on the frame and fabric. Avoid overtightening; forcing the nuts to their maximum can damage the springs. For electric recliners, a careful diagnosis of mechanical strain should be done before extensive tension adjustments, as it could be related to other internal faults. Repeat the process of adjusting and testing until the recline feels smooth and controlled. Proper tension helps you find a comfortable position, which is especially important if you occasionally use the recliner for improved breathing during sleep. If your chair is a power model, note that manually bypassing the motor is a different process used during an outage, not for tension adjustment. You should also adjust tension to suit your build, decreasing it for a petite frame or increasing it for a taller or heavier user.

Restore Reclining Performance:Designed to replace worn or damaged tension pads, helping restore smoother reclining movement and more consistent resistance adjustment during everyday use

Product size: Total length: 3-5/8 inches (measured from hook to hook as 3.46 inches), coil diameter: 13/20 inches, coil body length: 1-13/22 inches, wire diameter: 2mm, hook angle: 45 degree deflection

6 Inch long hook spring
Replace Worn or Damaged Recliner Springs
Worn or damaged springs can cause a loose recline or an unstable chair. To replace them, start by tipping the chair over safely and gathering your tools: pliers, a wrench, and safety goggles. Carefully detach the old spring from both anchor points, noting its length and coil diameter to ensure an exact replacement. For specific guidance, consult the many available helpful video tutorials referenced in online repair guides.
When installing the new spring, hook the harder end first onto the anchor point. Use a puller tool like needle-nose pliers or vice grips to stretch the spring to the opposite frame hole, maintaining proper tension throughout. Maintain full control of the spring during this process to prevent it from snapping or recoiling. The spring should be taut but not overstretched to prevent future damage. Once secured, manually cycle the mechanism to check frame stability and ensure the recline feels solid and responsive. Prolonging the chair’s shorter lifespan due to moving parts is a key reason to perform maintenance like spring replacement.
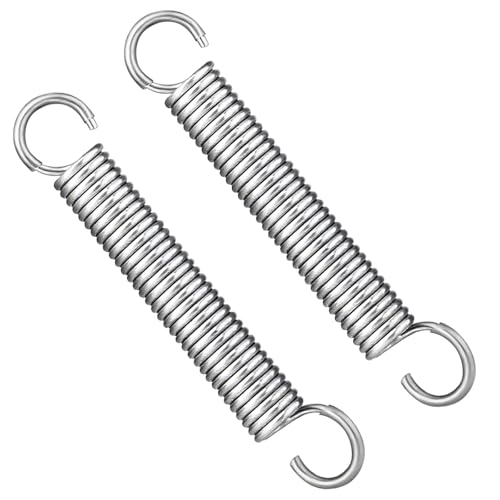
Wide Compatibility: 5-1/8" recliner spring replacement stainless steel sofa chair mechanism tension spring compatible with Ashley, Flexsteel, La-Z-Boy, and Homestretch recliners 2 PCS
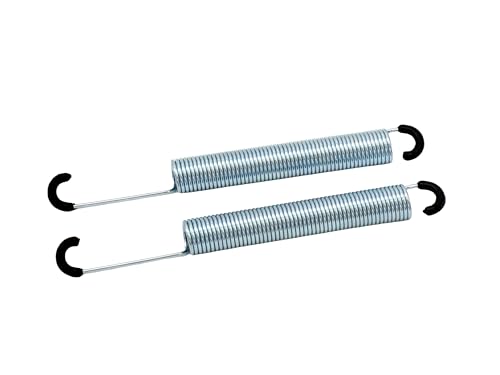
Mechanism assist / lock / tension spring.
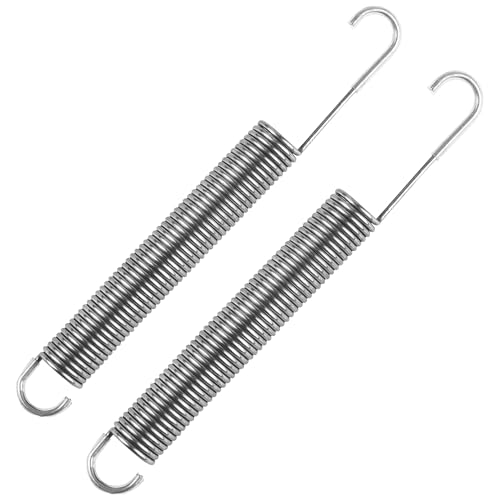
PRODUCT FUNCTION: The primary function of the recliner springs replacement can better support and cushion the weight and pressure of the body, providing users with a better experience and ensuring their safety ensuring optimal comfort for the user during use,and it can also be widely used in other items such as cars, bicycles, toys, lamps, furniture, car hood, crafts, molds, hardware and electrical appliances, etc
Clean and Lubricate the Moving Parts
To restore smooth operation to your recliner’s movement, start by cleaning the moving parts to remove grime that causes friction. Vacuum all seams and crevices thoroughly; this not only keeps the mechanism clean but also benefits adjacent areas. Use compressed air or a soft brush to clear dust from hinges and joints. Wipe metal surfaces with a damp microfiber cloth, but avoid soaking any parts and dry them immediately to prevent rust formation. For lubrication, choose a silicone spray or white lithium grease, and shake the container well before use. Apply it sparingly to pivot points and tracks, then work the mechanism through its full range of motion to evenly distribute the lubricant. For motorized chairs, this process helps maintain the electric motor and gears that power the reclining function. It is important to ensure your power recliner is plugged in or its battery pack is charged before testing the mechanism after lubrication. This routine, combined with regular inspection for obstructions, helps preserve the chair’s mechanics and enhances overall durability.
Secure Loose Screws and Components
First, inspect the underside of the chair for loose screws or bolts at connection points and along tracks. Use the appropriate screwdriver or wrench to tighten any that have become wobbly, but avoid overtightening, which can strip threads or damage the components. Replace any damaged or missing screws with exact matches to maintain stability. This stability is as crucial for a manual recliner as it is for the reliable operation of a power lift chair mechanism. Check areas like armrests for loose bolts, ensuring all fasteners are secure and flush, so they don’t poke through the cushion padding. A loose or worn locking pawl is another common culprit for a wobbly back that should be inspected and tightened or replaced. If the recliner leans or feels uneven, you should also check for misaligned hardware and adjust any tension screws accordingly. If you find stripped holes, fill them with wood filler or similar material to restore a secure hold before re-tightening. This prevents future loosening and keeps the chair stable during use.

【Universal Lever Style Handle】Replacement Lever Style Recliner Handle and Escutcheon With Brown Paint.

Stable Support: This recliner chair screws and nuts set helps tighten armrest and connector points, reducing wobble and misalignment so your seat feels more solid during everyday use

The size of handle's mounting hole: 5/8 inch square, 3/4 inch deep, please DO check your original handle's mounting hole dimension before order.
Test Your Chair’s Recline Resistance
To test your chair’s recline resistance after securing loose screws, start by locating the round tension knob under the front edge of the seat. Turn this knob clockwise in small increments to increase the resistance, making it more difficult to lean back. After each adjustment, perform a core muscle test by sitting upright and using just your core muscles to recline. You should experience a smooth yielding motion without a sudden snap back or excessive ease. Next, check the micro-recline by applying a slight breath-initiated shift; this should initiate a gentle tilt. Finally, lean back fully to verify full weight stability, ensuring your chair does not drift unexpectedly. While the chair’s aesthetic design remains important, the effectiveness of these tests confirms your fix more than any brand comparison, and you can consider complementing your design style with your functional recliner to maintain overall harmony. If your chair has a more complex reclining mechanism, consult the manufacturer’s guide for specific instructions on detaching the armrests to access internal components. Make sure the operation remains smooth and free of straining sounds for optimal support.
Troubleshoot Persistent Recline Problems
If tightening loose screws and adjusting the tension knob didn’t fix your recliner’s issues, you can still troubleshoot persistent recline problems by inspecting the mechanical components underneath. Flip the chair over to access the underside mechanism. Use a wrench to tighten any loose bolts and replace stripped hardware immediately to ensure all parts are secure. Look for bent or cracked components, which can interfere with smooth operation, and check tension springs for signs of wear or damage. Adjust in half-turn increments for safety and precision when working on springs, and always test the recline after each adjustment. Worn springs should be replaced to restore proper tension and function. This mechanical maintenance, combined with a planned upholstery renewal, helps improve both the performance and appearance of your chair. Finally, clean and lubricate the tilt mechanism with silicone spray and test the recline to ensure it moves smoothly. Recalibrate the tilt angle as needed for your comfort.
When to Call a Professional for Repair
You should call a professional for recliner repairs when you encounter electrical or motor issues, such as unresponsive controls or grinding noises. Complex mechanical failures, like broken internal gears or a sagging frame caused by snapped components, also require expert skills. If basic troubleshooting or minor fixes don’t resolve the problem, it’s best to involve a qualified technician to avoid further damage or safety hazards.
Always check your warranty before attempting repairs; DIY fixes might void coverage. Most importantly, prioritize safety—avoid handling high-tension mechanisms, sharp internals, or heavy components unless you are confident in your skills. The risk of personal injury or sudden collapse outweighs the benefit of a quick fix. Certified technicians have the right tools and expertise to restore your recliner safely and efficiently, especially for hazardous or complicated repairs.