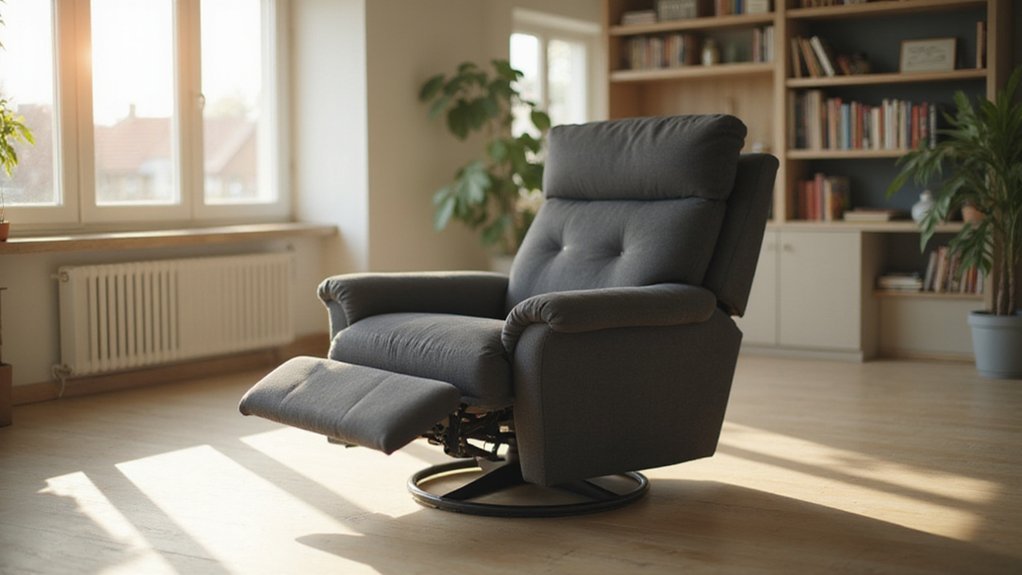
Moving a heavy recliner can feel tricky, especially if you’re worried about damaging your floors or injuring yourself. The key is to plan ahead and take it slow, using the right tools and techniques.
By following simple steps—like measuring doorways, disassembling parts, and using a dolly—you can make the process safer and easier.
Keep reading to see exactly how to move your chair smoothly and safely.
Measure Your Recliner and Doorways Before You Start
Measure your recliner and doorways before you start. Extend the chair fully to get its total length from headrest to footrest. Record its width and depth as well, since these dimensions determine whether it can pass through tight spaces. Check each doorway on your route, measuring the actual inside width and height, ignoring any molding or trim. Be sure to include hallways and thresholds in your measurements. This careful planning helps protect your investment, as a quality recliner can last for 15 years or more with proper care. Ensure that every opening is at least two inches wider and taller than your recliner’s corresponding dimensions. This extra clearance helps avoid damage and makes maneuvering easier. For particularly difficult passages, you can remove the back panel to significantly reduce the chair’s overall dimensions, a process that often involves locating and unlocking the locking levers or spring clips. Identify any narrow spots or tight corners where you might need to tilt or angle the chair during the move. Accurate measurements prevent surprises and save time during your task.
Gather the Right Moving Supplies and Tools
To gather the right moving supplies and tools, start by selecting furniture sliders suited to your floor type. Use padded discs for carpeted surfaces to prevent tears and damage, while smooth plastic or rubber sliders work best on hardwood floors to avoid scratches. Always match the size and load capacity of your sliders to the weight of your recliner to ensure safe movement.
Next, choose a suitable dolly. A utility dolly with a star base is ideal for narrow or oddly shaped furniture like recliners, as it provides maneuverability in tight spaces. For more stability, a flat furniture dolly with a high weight capacity is recommended, especially for heavier items. Secure the load with heavy-duty nylon ratchet straps to keep your recliner firmly in place during transportation. It’s wise to first disconnect the power recliner’s actuator to prevent any accidental activation or strain on the electronic components during the move.
Protect your furniture and floors further by using blankets or moving pads to cover large or delicate pieces temporarily. These can help prevent scratches and dents, especially when navigating through doorways or crowded areas. For full disassembly to make the move even easier, follow a guide on carefully removing the reclining mechanism and other components. Finally, verify that your moving insurance policy covers high-value items like a recliner, providing peace of mind during the move. When positioning your recliner in its new location, remember that while prolonged recliner sleeping may offer relief from conditions like sleep apnea, it can lead to posture problems over time, so consider its placement relative to your primary bed.

SET OF 4 FURNITURE SLIDERS FOR CARPET: Makes it easy to move even the largest and heaviest items like beds, sofas, dressers, tables, bookcases, and heavy appliances with minimal effort while protecting carpeted surfaces from damage

✌ IS YOUR FURNITURE TOO HEAVY TO MOVE IT EASILY? ARE YOU SCRATCHING FLOORS WHILE MOVING THE FURNITURE? FORGET ABOUT IT with PREMIUM FURNITURE MOVERS BY X-PROTECTOR!

MOVE FURNITURE EASILY - Moving furniture can be the worst part of a move or remodel - but not with this resuable Super Sliders furniture movers kit. Simply place the movers under all your large, heavy items to quickly and easily move them across all surfaces - even carpet and hardwood
Clear a Path and Protect Your Floors
To guarantee a smooth move for your recliner, start with comprehensive obstacle removal. Clear the entire route by removing rugs, toys, and small furniture that could cause tripping or make moving cumbersome. Unplug and secure any cords that might snag or tangle, open all doors fully, and eliminate door stops to allow unrestricted movement. Protect your floors by laying down sheets of cardboard, old blankets, or commercial runners along the path to prevent scratches and dents. Before you begin lifting, sweep the area to clear away abrasive dirt and grit, as regular cleaning helps preserve appearance and comfort for your furniture. It’s also wise to check that your power recliner is closed and not stuck in an open position before attempting to move it, especially following a power outage. Before moving, manually test the recline movement to ensure the mechanism isn’t stuck or misaligned. Walk through the prepared route yourself to double-check for hidden hazards or obstacles. This careful prep work helps prevent accidents and keeps your floors safe during the move.
Disassemble Your Recliner for Easier Moving
To disassemble your recliner for easier moving, start by removing the fabric at the back. Detach any Velcro, tabs, or fasteners at the base of the back panel, gently pulling the fabric upward to expose the frame. Locate the locking tabs or screws holding the backrest in place, then press or unscrew them to release it. When using locking tab mechanisms, remember to release one side fully before the other to prevent jamming. This is similar to the process of safely removing a chair’s backrest by unlocking cam locks.
Next, detach the seat cushions, which are usually held on with screws or clips. Then, unscrew and remove the armrests and footrest components by accessing the bolts or screws underneath or inside the frame. Throughout the process, keep all screws, bolts, and small hardware organized in labeled bags to prevent losing any pieces. As you clean exposed surfaces during disassembly, remember to perform a spot test with any cleaning product before full application.
Taking photos during disassembly can serve as helpful references when reassembling later. Be sure to wear gloves for protection and to make handling easier. Tip the chair forward or carefully manipulate it to access hidden fasteners or joints, ensuring you do not force or damage any parts. When reattaching components like the backrest, you will align its metal arms into the corresponding slide-lock gadgets on the base. This step-by-step systematic approach simplifies moving your recliner and prevents last-minute damage or missing parts.

If your Lazy Boy recliner is intermittently dropping down a few notches or will not maintain elevation then these are the parts you need to fix the issue.

Compatible With: Fits For La-Z-Boy/ Lazyboy Power Recliners,Fits All L-Z-Boy Power Recliners

[1]:APPLY TO - Can be used in home furniture such as door, sofa, chair, lounge chair, recliner, etc. Suitable for repairing accessories for home, construction machinery, electrical equipment, mechanical device and more.
Wrap and Pad the Chair to Prevent Damage
Wrap and pad the recliner thoroughly to prevent damage during transport. Start by carefully wrapping vulnerable areas such as arms and headrests with bubble wrap to protect against scratches and tears. After securing the bubble wrap, cover the entire chair with moving blankets or thick furniture pads, overlapping seams to ensure complete coverage. Secure these pads with strong tape to keep them in place and prevent shifting. Once the padding is secure, wrap the entire piece with stretch wrap, working upward in spirals with moderate tension. This final layer keeps the blankets and pads in place without compressing the upholstery, creating a durable buffer that shields every surface from the legs to the headrest. If the chair has recently been reupholstered, be especially mindful to avoid excessive pressure on seams and new fabric covers. For a fully protected move, ensure the chair’s recliner chair mechanism is securely in its closed position before wrapping. Proper wrapping and padding are essential to keep your recliner safe during transit. When using a moving pad, place the chair in its center and wrap it around the furniture starting from the feet, ensuring full coverage of the legs.
Lift Your Recliner Safely to Avoid Injury
To lift your recliner safely and avoid injury, start by evaluating its weight. If it weighs over 100 pounds, get help from another person. Use a hip hinge by sending your hips back as you lower yourself to maintain a flat back and engage your legs. Stand close to the chair, position your feet shoulder-width apart, and bend your knees—not your waist. Keep your back straight, engage your core muscles, and secure a firm grip on sturdy points of the frame. Use your leg muscles to push upward, not your back, and lift smoothly without jerking. Be mindful that these sofas are often heavier than standard furniture due to their complex reclining mechanisms. Before moving the chair, you may want to adjust its tension settings to minimize accidental movement while handling it. For additional stability, you can also lock the reclining mechanism to prevent it from shifting during transport. Pivot your feet to turn if needed, and lower the chair slowly by squatting. Wear non-slip shoes, clear your path of obstacles, and avoid twisting your torso during the lift to prevent strain.
Maneuver Through Tight Doorways and Hallways
To maneuver your recliner through tight doorways and hallways, start by measuring the doorway clearance. Compare the recliner’s diagonal height—its longest dimension when tilted—to the narrowest passage in your home. If the recliner is wider than the opening, you may need to angle it or temporarily remove a door for easier passage.
Use pivot techniques by rotating the chair slowly while tilting one corner upward. This allows you to align the longest part of the chair with the passage, reducing the risk of damage. Enlist a partner to guide the tilt and gently push at the pivot point to maintain control.
Protect your walls by placing blankets or padding along the edges and securing them with painter’s tape to prevent scratches. Clear the entire route of any obstacles, including light fixtures and furniture. Walking the path beforehand helps identify potential hurdles and plan the best maneuver for a smooth, controlled transit. If the recliner’s seat has lost firmness during handling, you can restore it with simple DIY methods like adding support boards or replacing broken springs.
Use a Dolly for Long or Uneven Distances
Using a dolly for long or uneven distances makes transporting your recliner easier and helps protect your back and furniture. First, ensure the dolly’s weight capacity can support your chair’s weight. Choose a flat-platform utility dolly or a sturdier furniture dolly with rubber wheels for better stability. Lock the recliner upright, then wrap it in a blanket secured with bungee cords to prevent scratches. For a significantly easier move on bulky models, consider detaching the recliner back panel before moving it. To detach it safely, identify the securing clips or knobs typically found where the back meets the seat base. Tilt the chair and carefully slide the dolly underneath, aligning it with the chair’s center of gravity. Using the included lifter and pry boxes can assist with this step for heavy furniture. Strap the chair vertically to the dolly’s post and secure the base with cross straps. Roll slowly, keeping the chair tilted toward you, and avoid sharp turns to maintain control. Regularly check the wheels and straps for wear and tear before each use to ensure a smooth, safe move.

LOW-PROFILE DESIGN FOR TIGHT CLEARANCE: This compact furniture dolly measures approximately 16.3 x 11.4 inches and stands 3.2 inches high, making it ideal for moving smaller furniture, boxes, cabinets, appliances, plants, and other items with limited floor clearance. Please measure the space under your item before purchase to ensure proper fit.

[Innovative Interlocking Design]: You can connect two or more flat dollies together to move larger items just snap the two together, no tools or hardware needed.
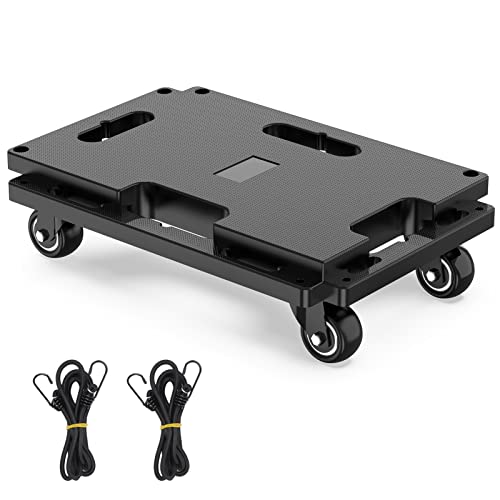
Innovative Interlocking Furniture Dolly: This furniture dolly 4 wheels heavy duty features a unique interlocking design, allowing you to connect two or more flat dolly carts horizontally or vertically with ease--no tools required! Great for moving large items like sofas, refrigerators, or heavy furniture
Navigate Stairs and Inclines With Care
Navigating stairs and inclines with a recliner requires careful planning and coordination. First, measure both the size of your recliner and the dimensions of your staircase or incline to ensure a safe fit and identify any potential obstacles. Clear the entire route to eliminate tripping hazards and give yourself ample space to maneuver.
Strong helpers are essential for lifting and guiding the chair. Always practice proper lifting techniques: bend your knees, keep your back straight, and hold the recliner close to your body. Coordination is key—position your strongest helper at the lower end of the staircase to bear most of the weight, while the guide at the top carefully directs movement.
Communication is crucial at each step. Before moving, agree on signals or verbal cues to coordinate effort. For landings or sharp corners, use precise turning techniques; for example, standing the recliner on its end can provide better leverage for pivots. Move very slowly during these turns to keep control and avoid accidents. Pausing frequently to rest prevents fatigue and helps maintain a safe, steady pace for both ascent or descent.

[Best moving items] There are two ways to use the lifting straps for appliance(arm-mounted and shoulder-mounted). It meets each of your moving needs, makes it easier and safer, and can avoid back pain and strain

Effortless and Waist Friendly: Crafted with ergonomic load-bearing design, our moving straps spread weight over shoulders and back instead of concentrating stress on arms. It helps minimize waist discomfort and muscle ache, allowing effortless heavy-item transport and easing the physical burden of moving work.

Durable PP Material: Made of high-performance polypropylene webbing; ensures strong wear resistance and long-term use for moving heavy items
Reassemble and Test Your Recliner After the Move
After moving your recliner, it’s essential to reassemble and test it carefully. Start by unpacking all parts and inspecting them for damage or defects. Reattach the backrest securely to ensure stability, making sure the frame is tightly secured. Connect the internal mechanisms, applying lubricant to joints if needed, to guarantee smooth operation. Before finalizing the connections, use a multimeter to perform continuity checks on any electrical components like switches and wiring to ensure they are functioning correctly. If you removed any accessories like cup holders or side pockets, reattach those accessories carefully. Before testing, wipe down the fabric with a damp cloth to remove dust and debris from the move. Finally, operate all manual and electric functions thoroughly. Sit in the chair and test the controls across their full range to verify everything locks securely, with no wobbling or resistance. Doing this ensures your recliner is both safe and fully functional after the move.